
Ever tried to seize what’s in your Mac display? It appears easy sufficient, proper? Simply click on a button and voila – prompt recording. However if you happen to’ve ever truly tried it, you already know it is not all the time that simple.
Possibly you’ll want to report a presentation together with your voiceover or seize a bug to indicate your IT division. Maybe you are attempting to avoid wasting a vital second out of your favourite sport. Regardless of the motive, while you Google “learn how to display report on Mac,” you are hit with a barrage of choices, strategies, and instruments. It is overwhelming, to say the least.
This is the factor: Apple has built-in instruments for display recording, however they are not all the time apparent or intuitive. And generally, they’re simply not sufficient for what you’ll want to do. So to ensure you’re good, we’ll stroll you thru every little thing – from the fundamental built-in choices to superior third-party options. By the point you are performed studying, you’ll seize something in your Mac display, with or with out audio, precisely the best way you want it.
Find out how to Display Document on Mac: Quicktime Model
Let’s begin with the fundamentals. Observe these easy steps to report your display.
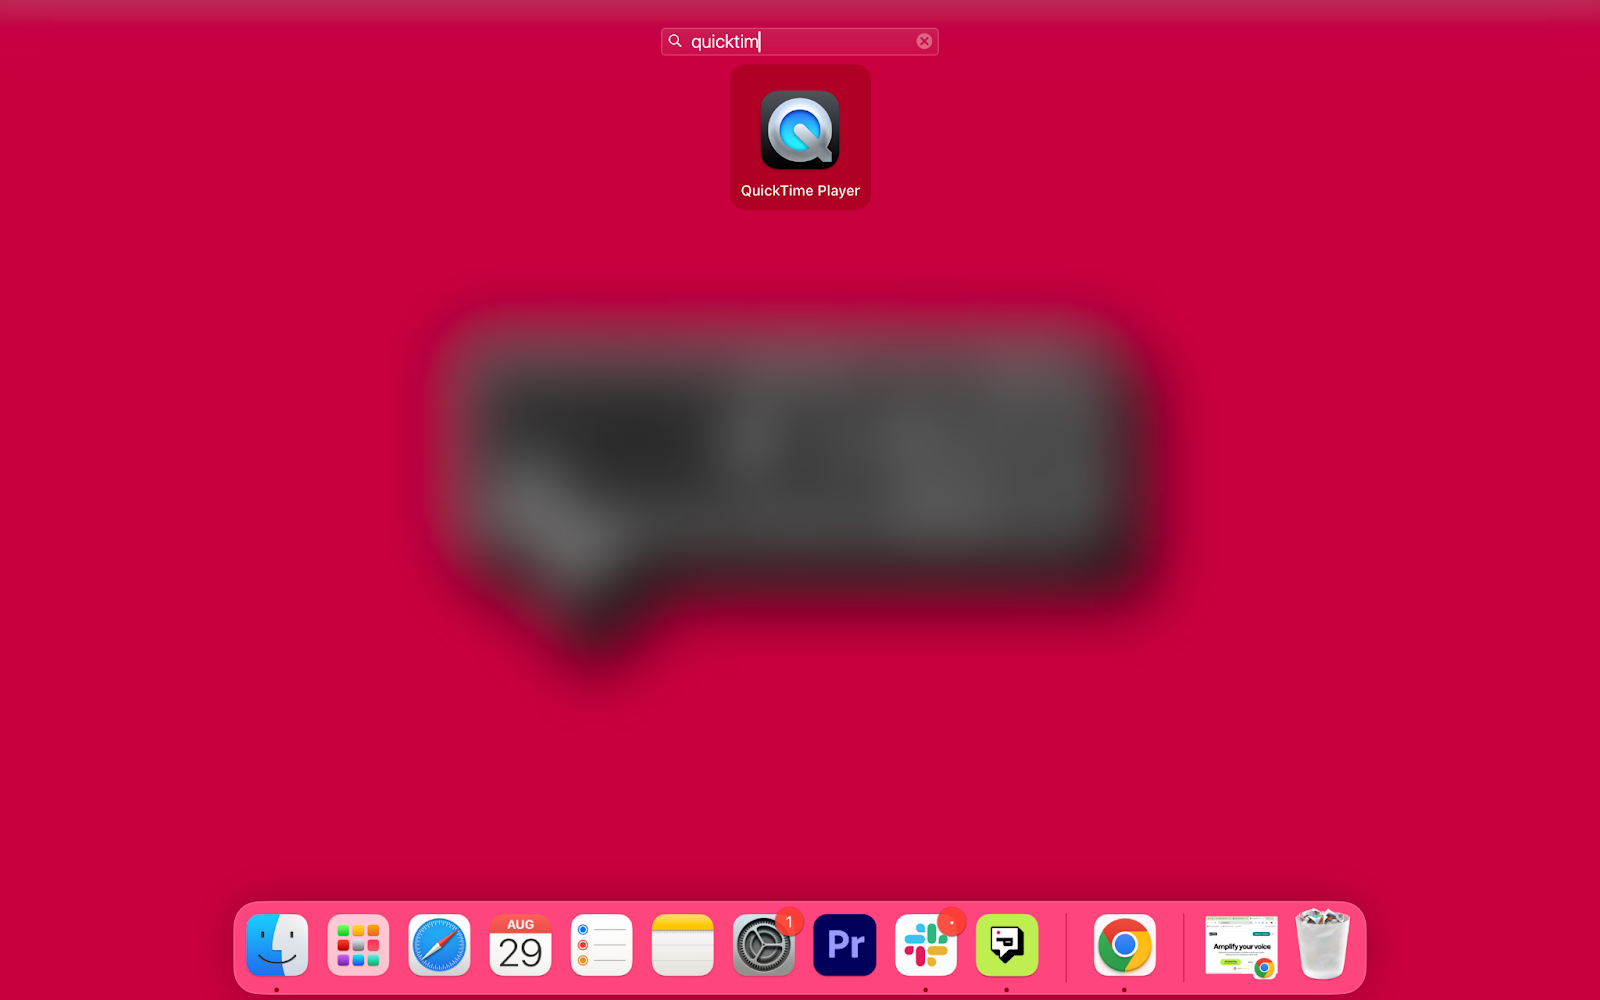
1) Discover and open QuickTime
Seek for QuickTime in your Launchpad and open it. The best method to display report on MacBook is with Quicktime, the video recording software program that routinely comes together with your Mac.
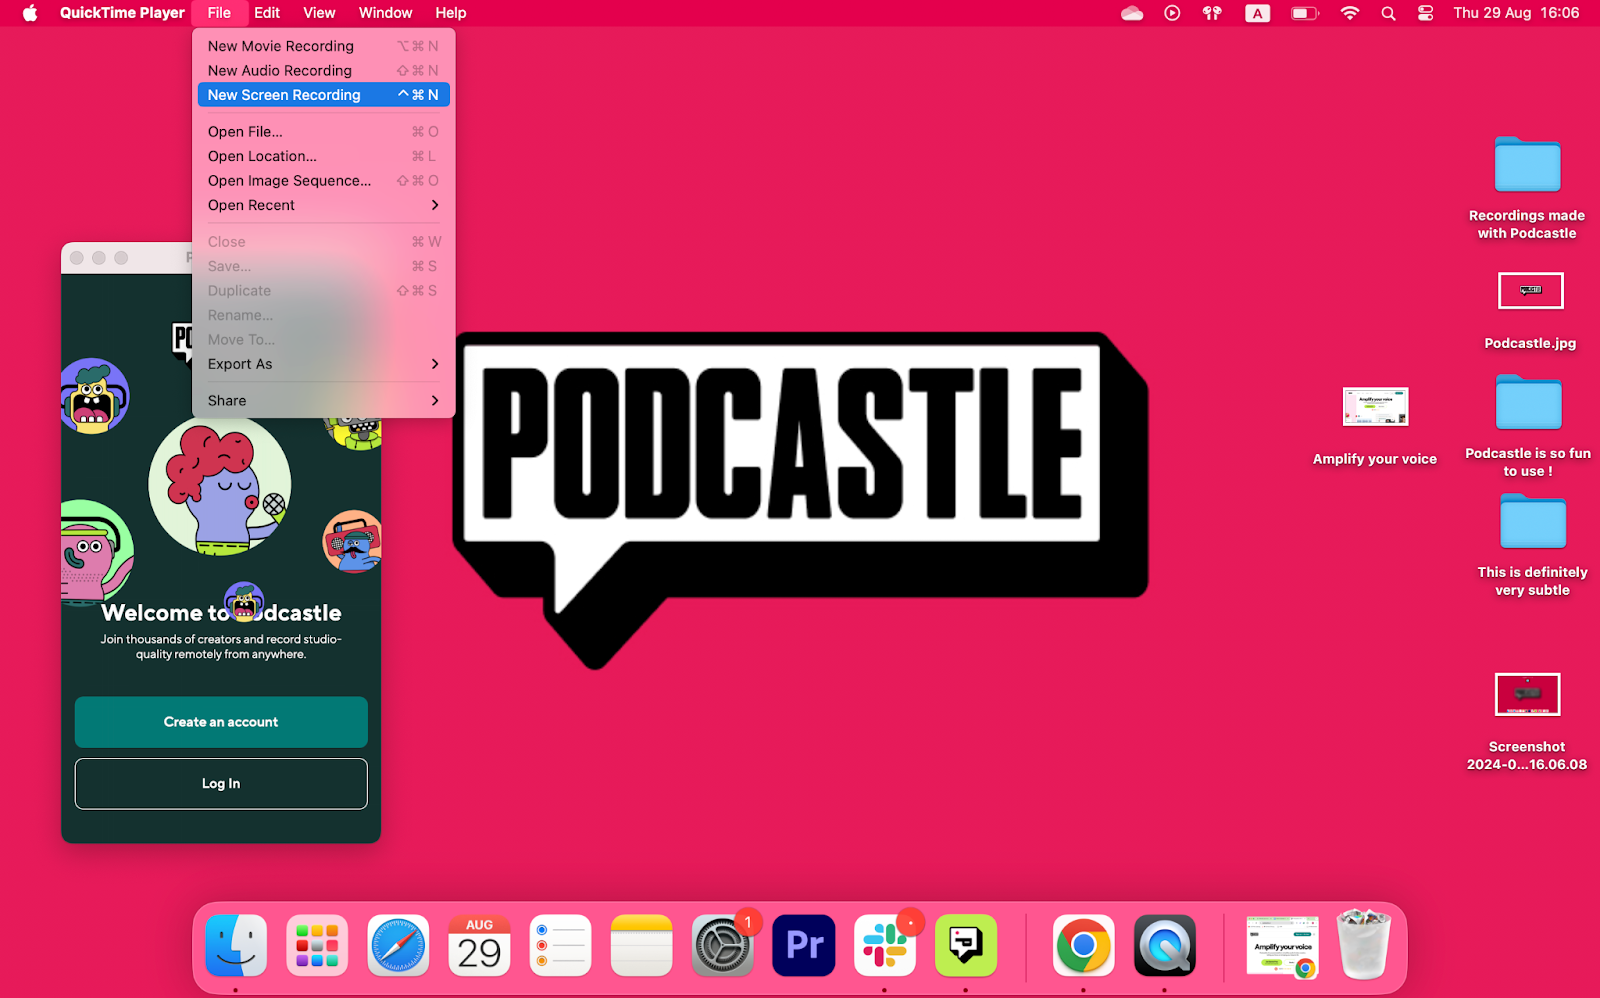
2) Begin a recording
In your Mac, select File > New Display Recording or just go along with the ^ Command N shortcut. This may open the QuickTime recording choices.
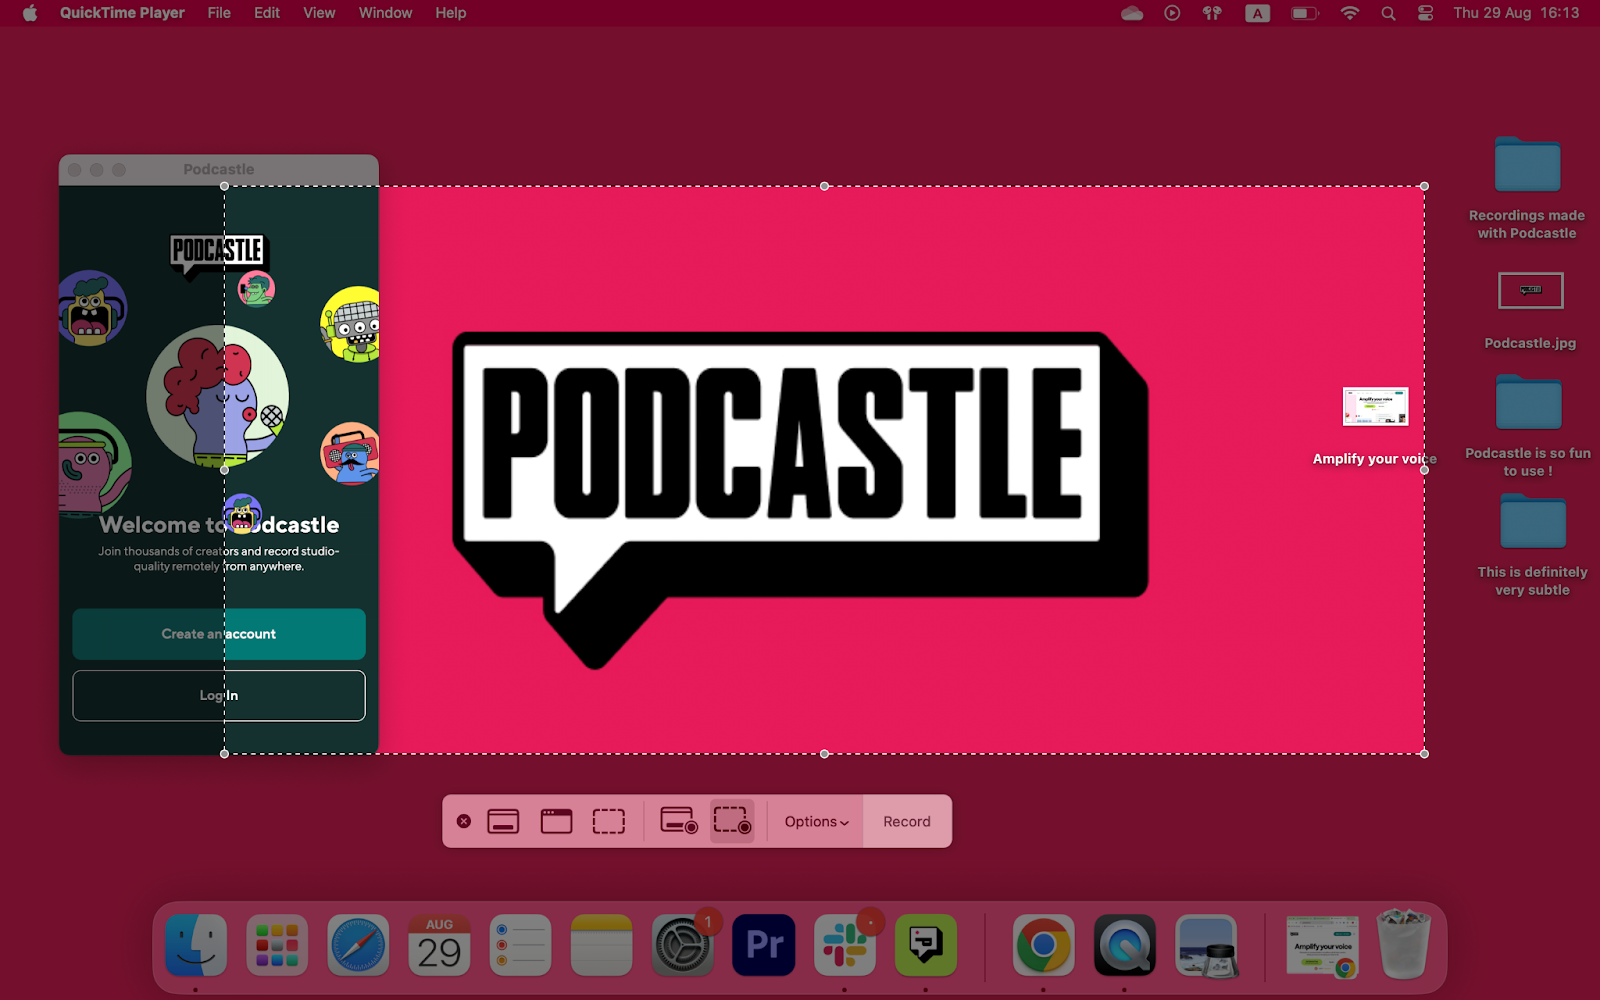
3) Select your recording choices
QuickTime permits you to configure your display recording choices. Select whether or not you wish to report simply part of your display, only one window, or your total display, and press report.
4) Cease your recording and find it
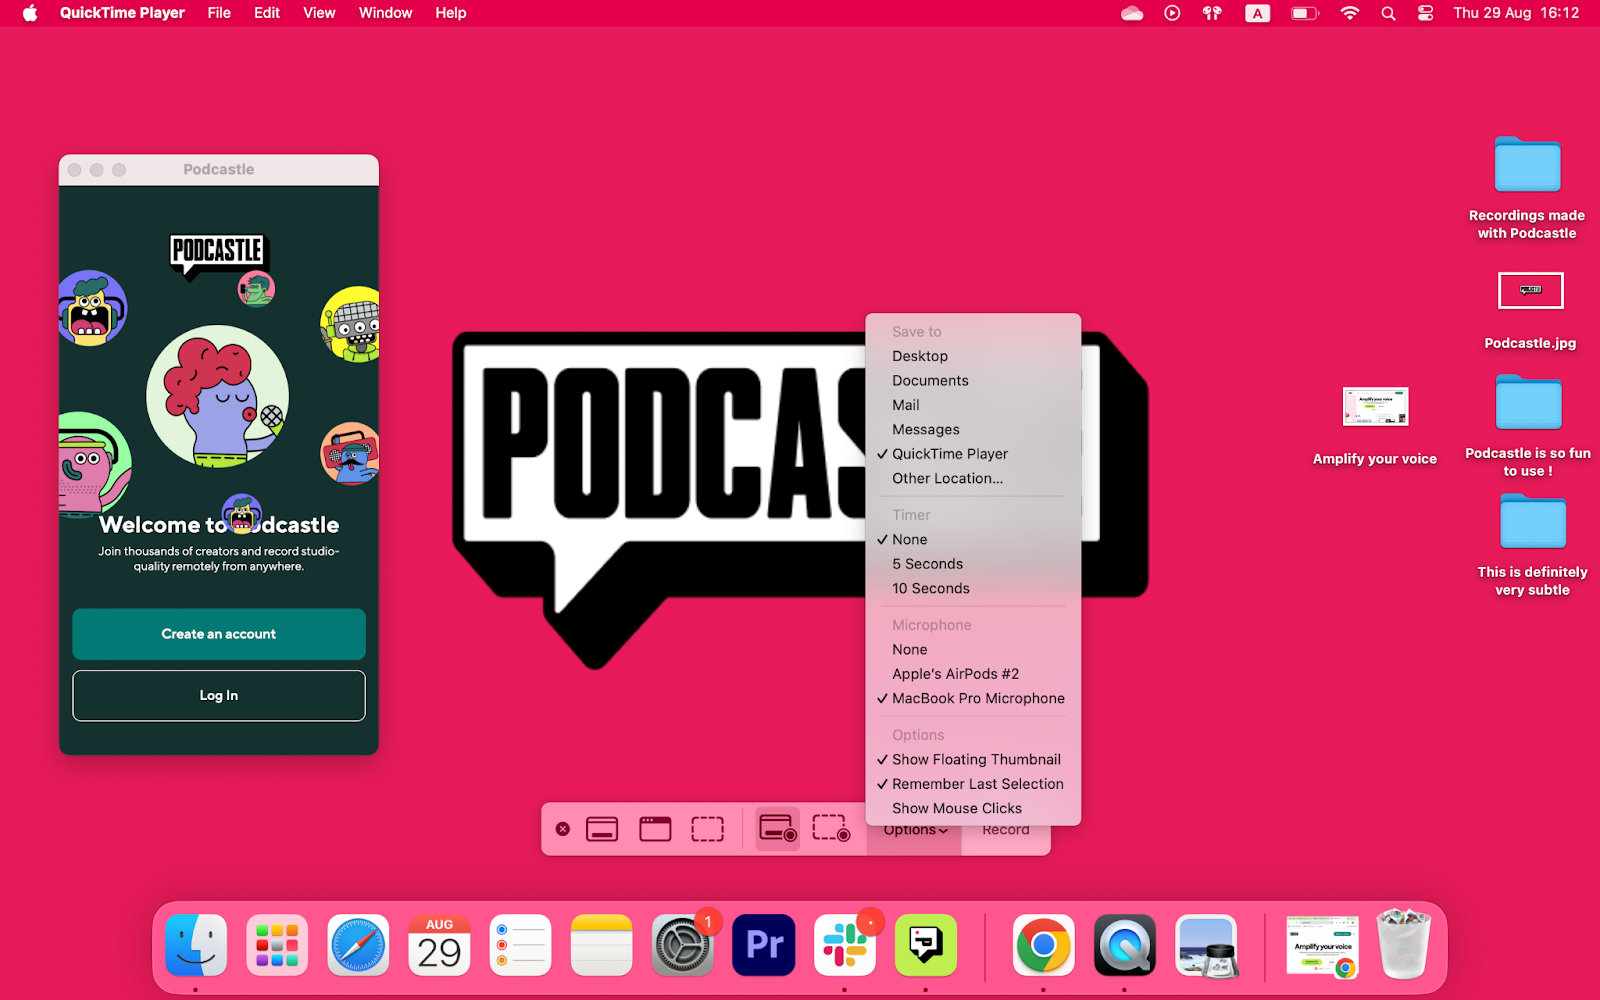
Find out how to finish display report on Mac? Simply click on on the Cease icon in your display, and also you’re performed! However the place do display recordings go on mac? QuickTime, by default saves your recordings on the desktop, however you possibly can configure these settings by selecting a special folder within the Choices earlier than you begin recording. In any other case, will probably be saved proper in your desktop.
Bonus Tip: Find out how to display report with audio on Mac?
By the best way, if you wish to display report Mac with audio, all you’ll want to do is configure the settings within the Choices menu earlier than you begin the recording. To report Mac display and audio, select the MacBook microphone or exterior mic if out there out of your Microphone choices, and your recording shall be saved with audio.
As you possibly can see, macbook display recording is fairly simple. However what if you happen to simply need a easy screenshot and don’t want a complete video for that? We now have you coated there, too!
Find out how to take a screenshot on Mac?
To take a screenshot on a Mac, use the next shortcuts:
1) Seize Your Total Display

Wish to seize every little thing in your display? Simply press Shift + Command + 3. In the event you see slightly thumbnail pop up within the nook, click on it to edit, or simply let it save on to your desktop.
2) Choose a Portion of the Display

Want a particular space? Hit Shift + Command + 4. Your cursor will flip right into a crosshair—merely click on and drag to focus on what you need. In the event you change your thoughts, press the Esc key to cancel. Launch your mouse to take the shot!

To seize a complete window or menu, open it up first, then press Shift + Command + 4 + House bar. Your cursor will flip right into a digicam icon. Click on on the window to snap it! Maintain the Possibility key whereas clicking if you wish to skip the window’s shadow. Identical to earlier than, edit the thumbnail if it pops up or let it save to your desktop.
Find out how to Display Document on Mac With out QuickTime?
In the event you’re searching for a web based device to display seize your Mac, Podcastle is the best possibility on the market. Apart from being a simple display recorder, Podcastle is ready to improve your audio and video high quality with AI options that take away background noise and upscale video decision, so if you happen to additionally wish to embrace webcam footage in your Mac video display seize, then that is positively the best way to go.
Right here is learn how to display report with Podcastle in three easy steps:
1) Begin a brand new challenge
As soon as logged in to Podcastle, go straight to the Recording Studio to begin your display recording.
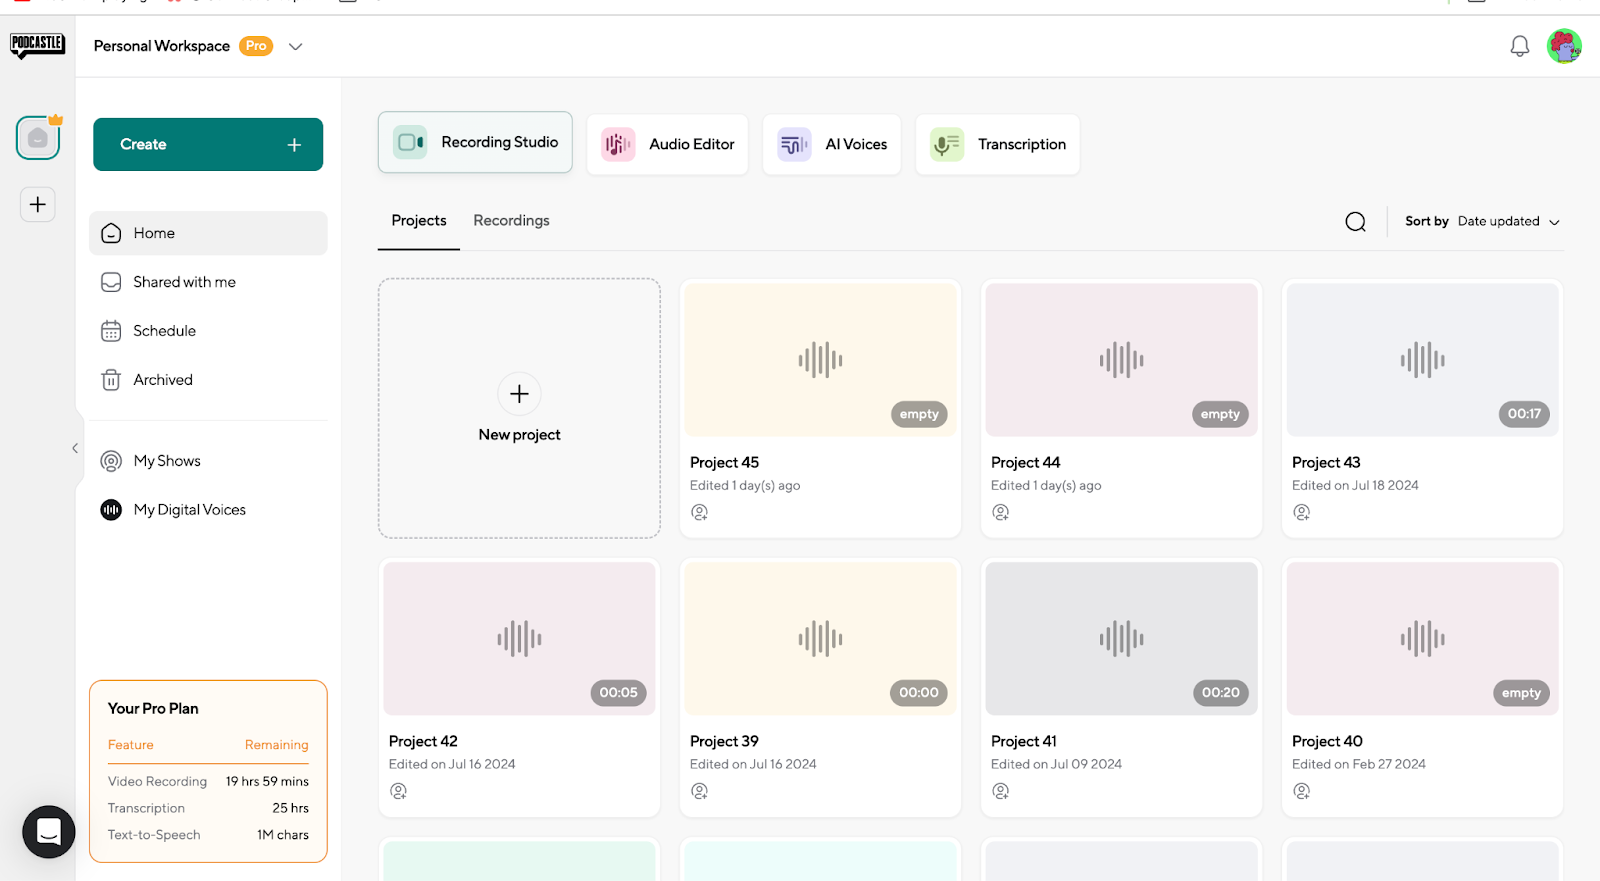
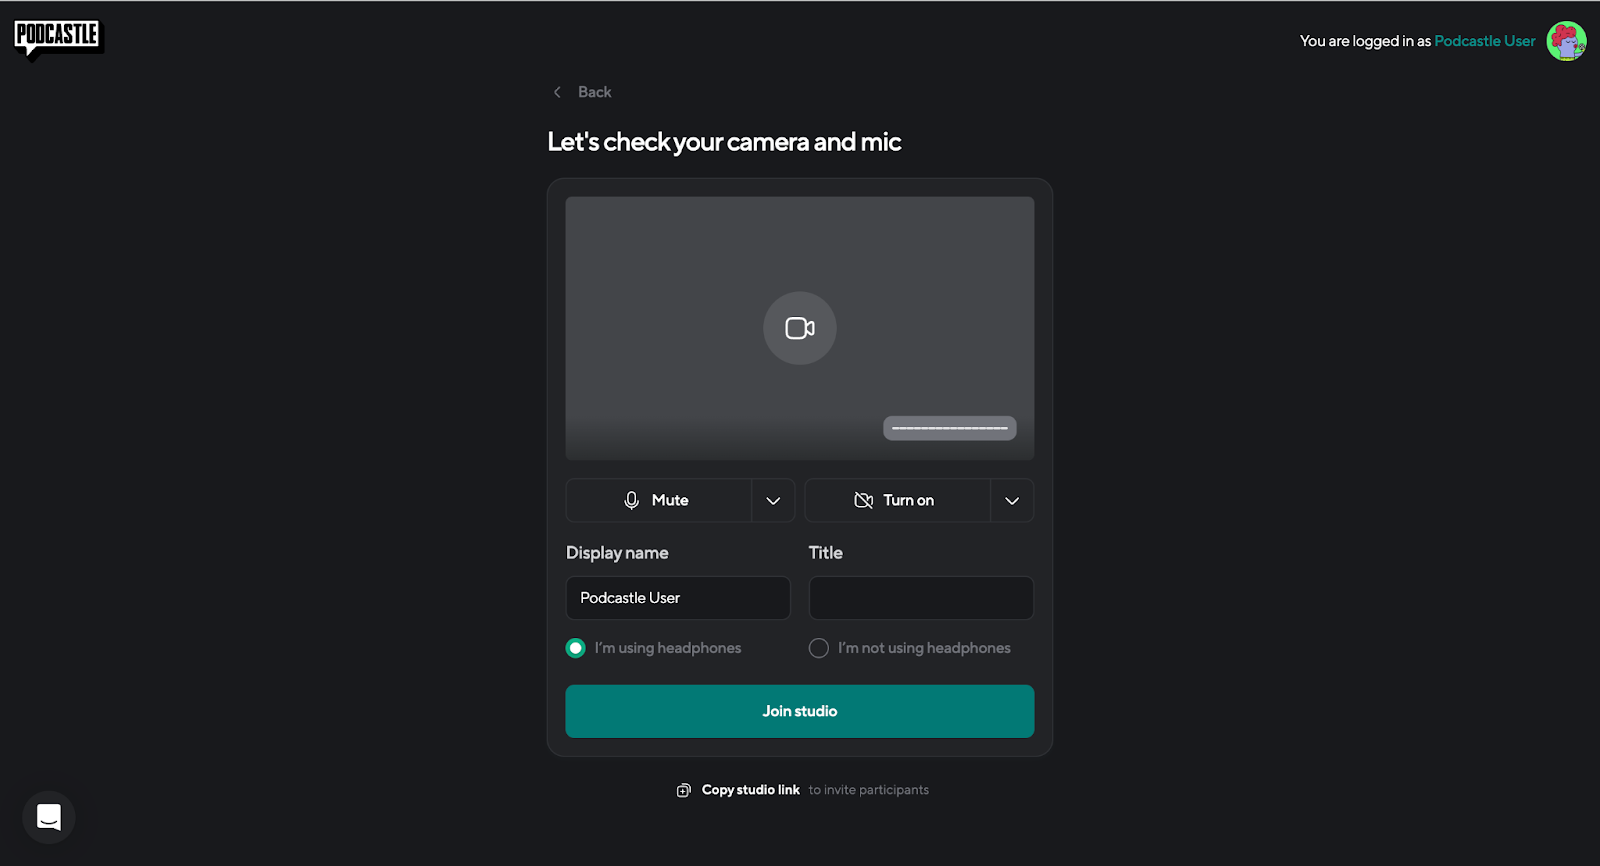
From right here, select the video recording possibility and configure your settings. Give a title to your recording, toggle one of many headphone choices, and invite company in case you have any.
2) Select the display share possibility in your recording
Whenever you’re forwarded to your recording studio, click on on the Display share possibility in your decrease panel. Select the way you need your Mac video display seize to look (total display, one window, and many others.), and that’s it. You’re set to your recording! If you would like your ultimate video to incorporate your webcam recording, hold your video settings on and hit Document.

3) Edit and export
As soon as your Mac video recording is finished, you can begin modifying it on-line with Podcastle’s video editor. It’s all quite simple and straightforward.
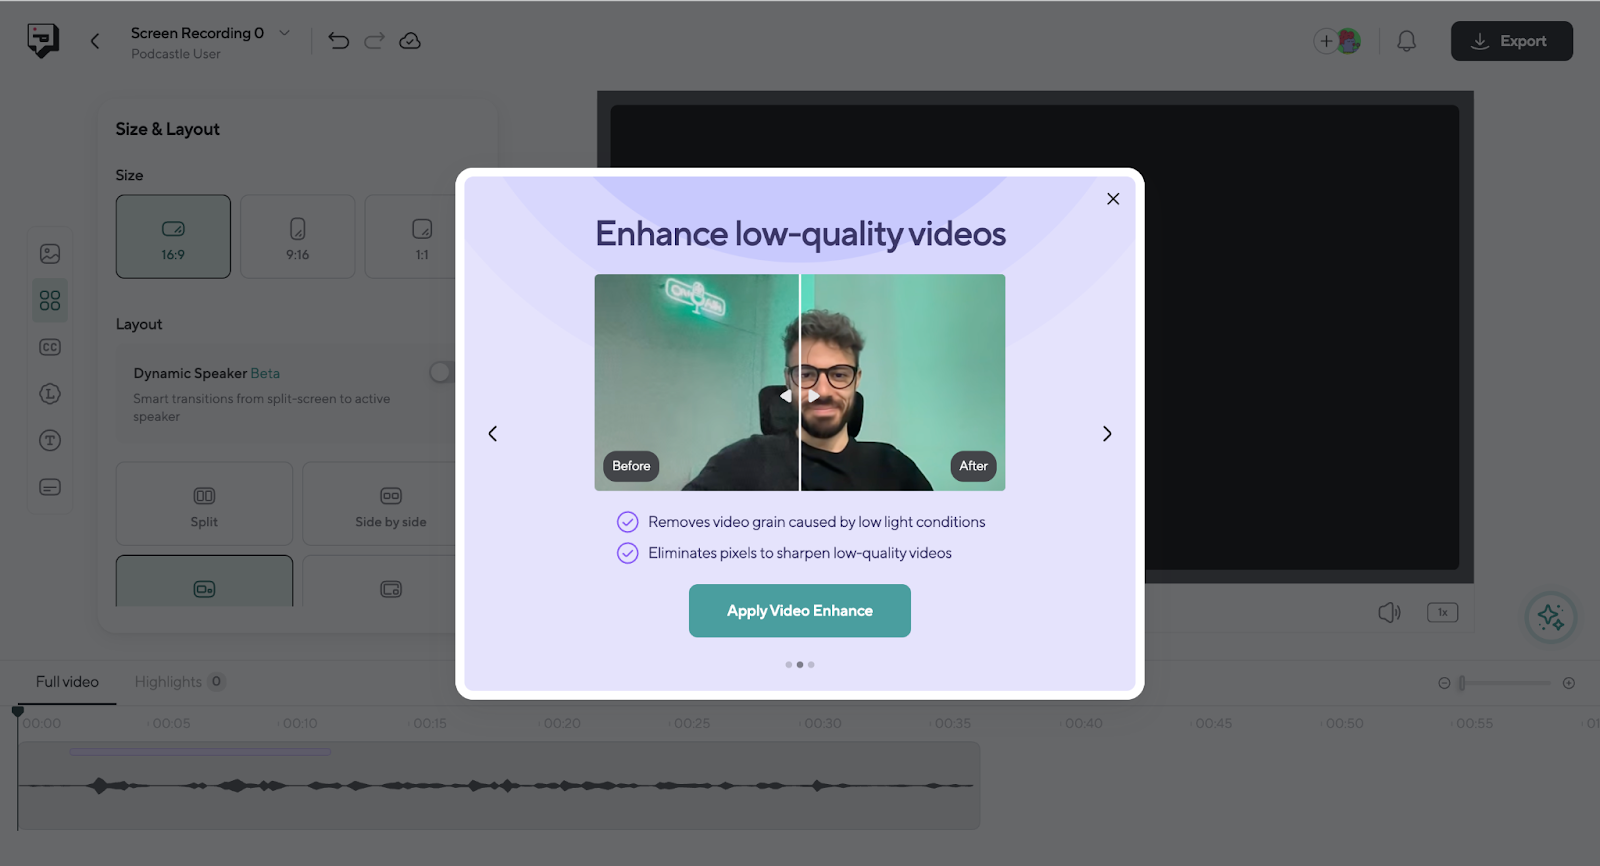
Improve your video high quality
First, you possibly can enhance the standard of your webcam video recording by making use of Podcastle’s video enhancer.
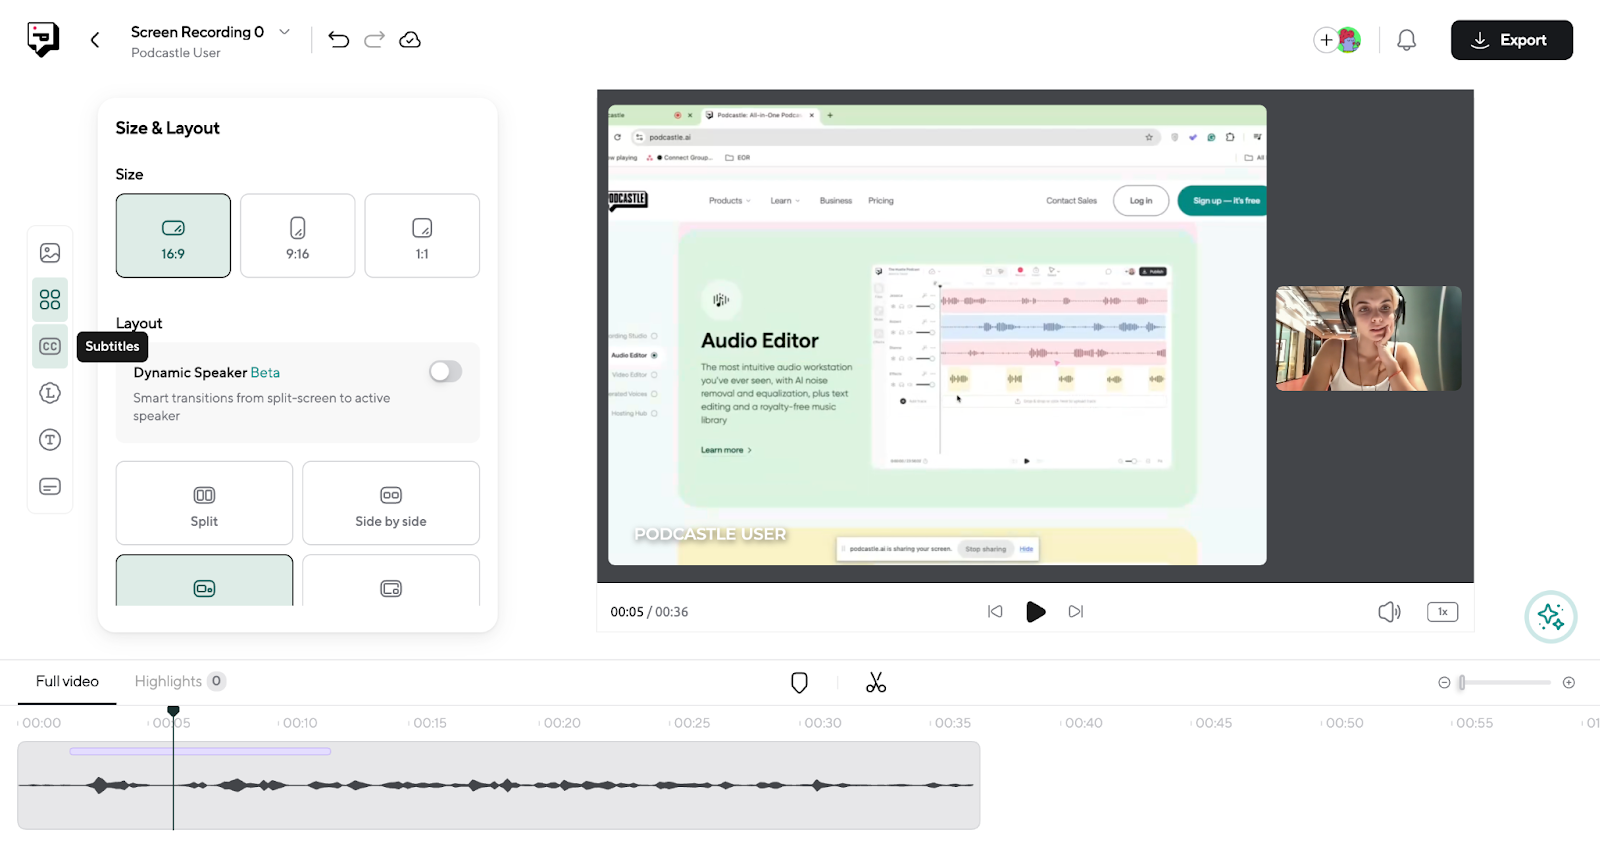
Change your video dimension and structure
Then, you possibly can select which structure and dimension you need your ultimate video to have. We went with the default possibility, however you can even go for the 9:16 dimension or 1:1, each of that are nice for social media content material. Additionally, you possibly can select the place you need your webcam video to be displayed on the display by enjoying round with the structure settings.
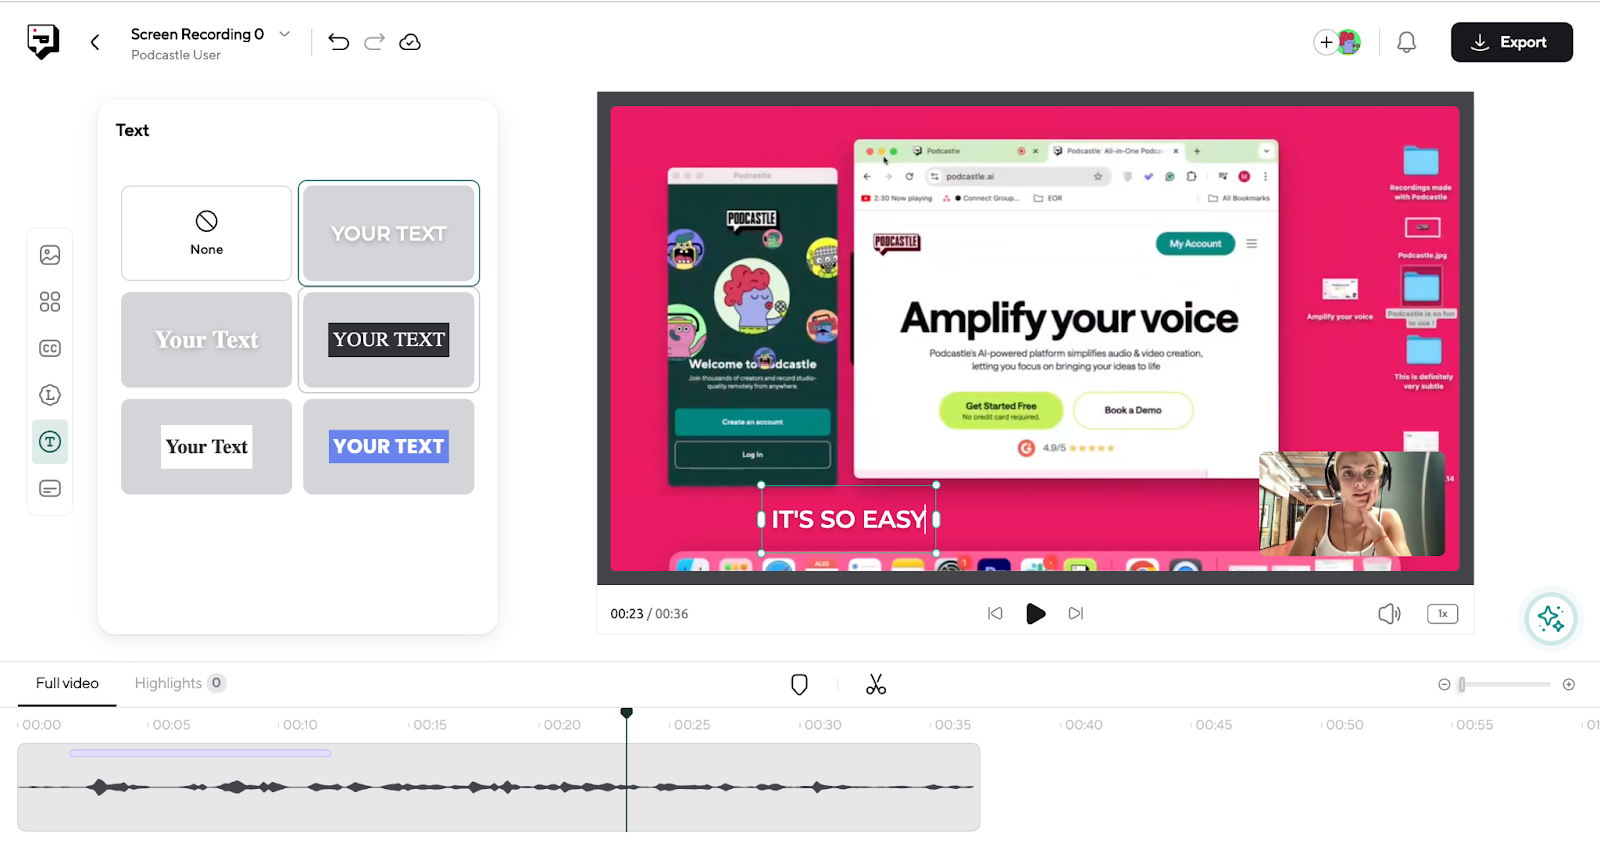
Add textual content, subtitles, and extra
Podcastle additionally permits you to add branding components by including your brand, routinely transcribe and add captions to your video, add textual content, break up and reduce your video, and extra. So, edit it to perfection and export the ultimate file to share it with the world.
That’s just about it; we hope you might have every little thing you’ll want to display report on Mac with out having to Google it once more. Joyful recording!