


There isn’t any higher approach to present one thing on a tool than through display screen recordings (aside from display screen share calls). More often than not, emails and voice recordings will not do – you want to present it. Recording tutorials, displaying the answer to an issue or strolling somebody by way of a course of are all wonderful use circumstances for display screen recordings.
Nevertheless, one factor that may typically be missing in display screen recordings is high quality audio. Whether or not you are recording your self or a narration, it is not at all times simple to get the audio good. On this article you may be taught the way to add audio to display screen recordings on Apple units.
Tips on how to Document Your Display With Audio on iOS
To file your display screen on an iPhone or iPad, you may have to use the built-in display screen recording within the Management Heart of your system. This device is made by Apple and is totally free to make use of. This device is obtainable solely with variations of iOS 11 or later. This is the way to file your display screen with audio on an iOS system:
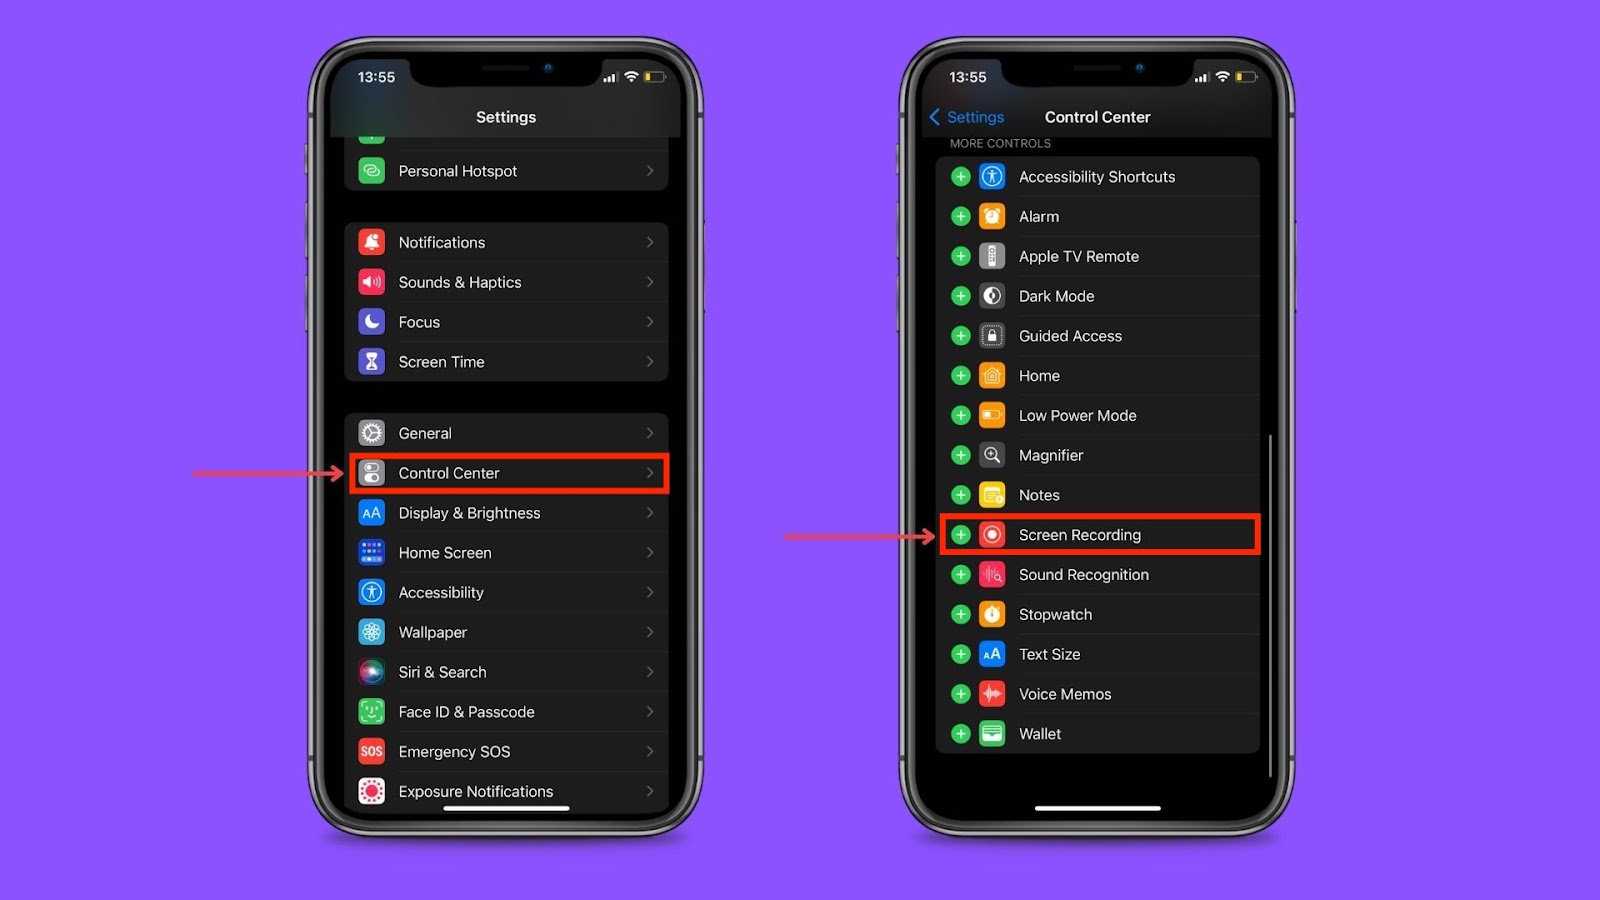
1. Open the Management Heart within the Settings of your system and faucet the plus (+) icon subsequent to the Display Recording icon so as to add it to your Management Heart. It needs to be added by default, however you possibly can test to make sure.

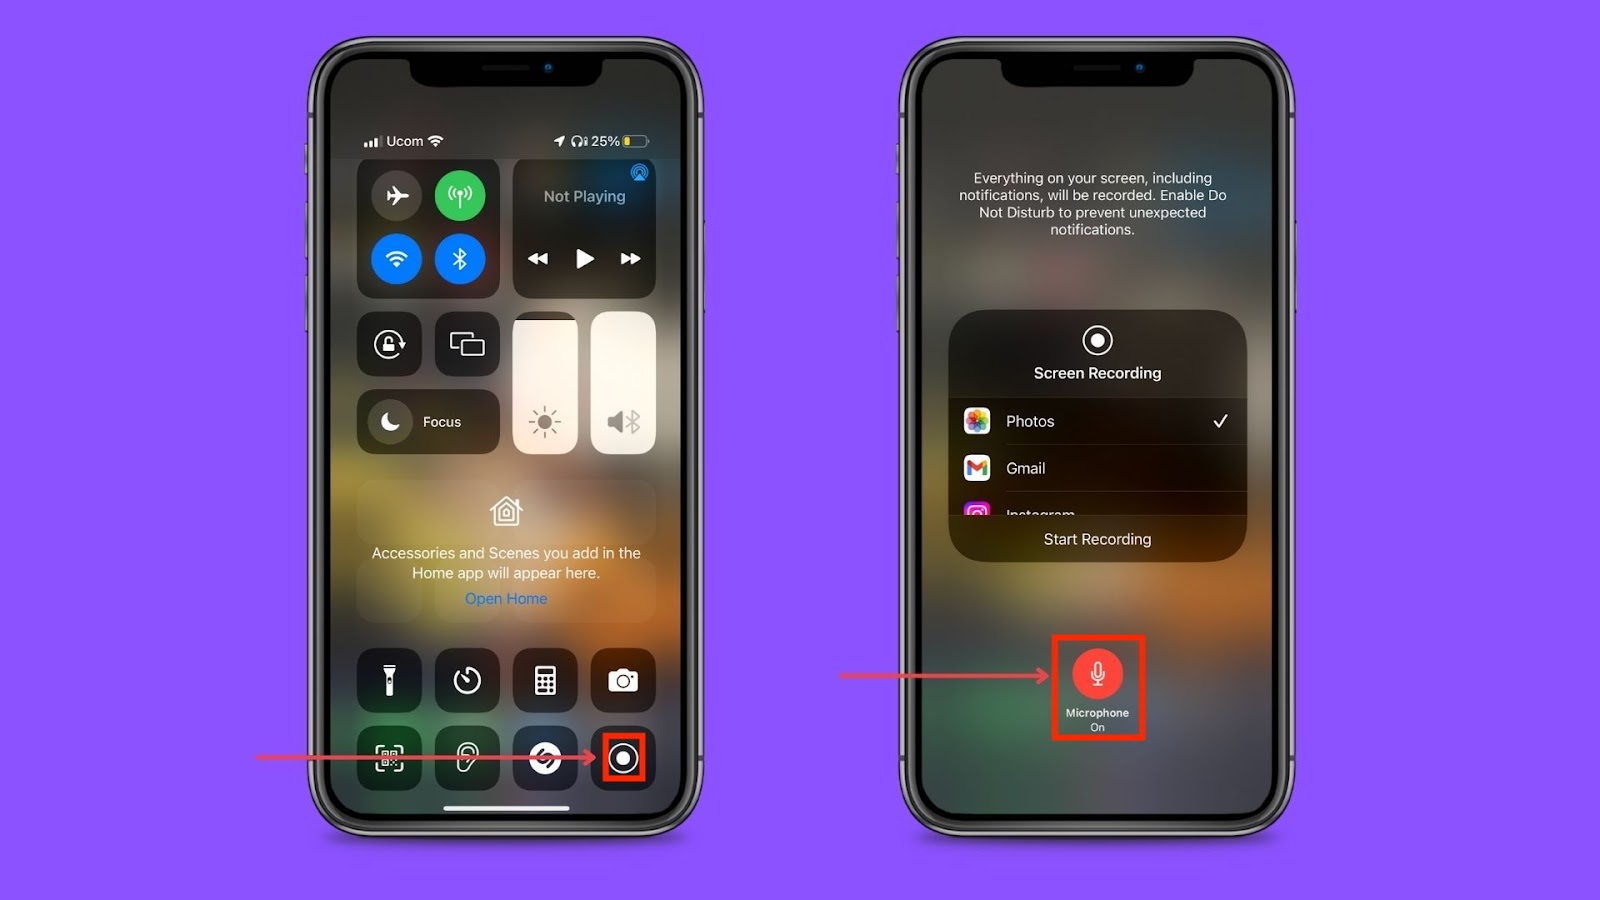
2. Should you’re utilizing iPhone 12 or later fashions, swipe down the top-right fringe of your display screen to open the Management Heart. For earlier iPhone fashions, swipe up from the underside of the display screen. Faucet on the Display Recording device in your Management Heart. Keep in mind that the recording may also choose up inside audio (apps, internet, and many others.) if in case you have your system’s ringer turned on. Flip the ringer off should you want to exclude inside audio.
In order for you the display screen recording to just accept exterior audio from the microphone as properly, press and maintain the Display Recording button and switch the microphone on as proven within the image beneath, and press “Begin Recording.” When the recording is full you may as well select the place to export the output. It is going to be saved within the Images app by default.
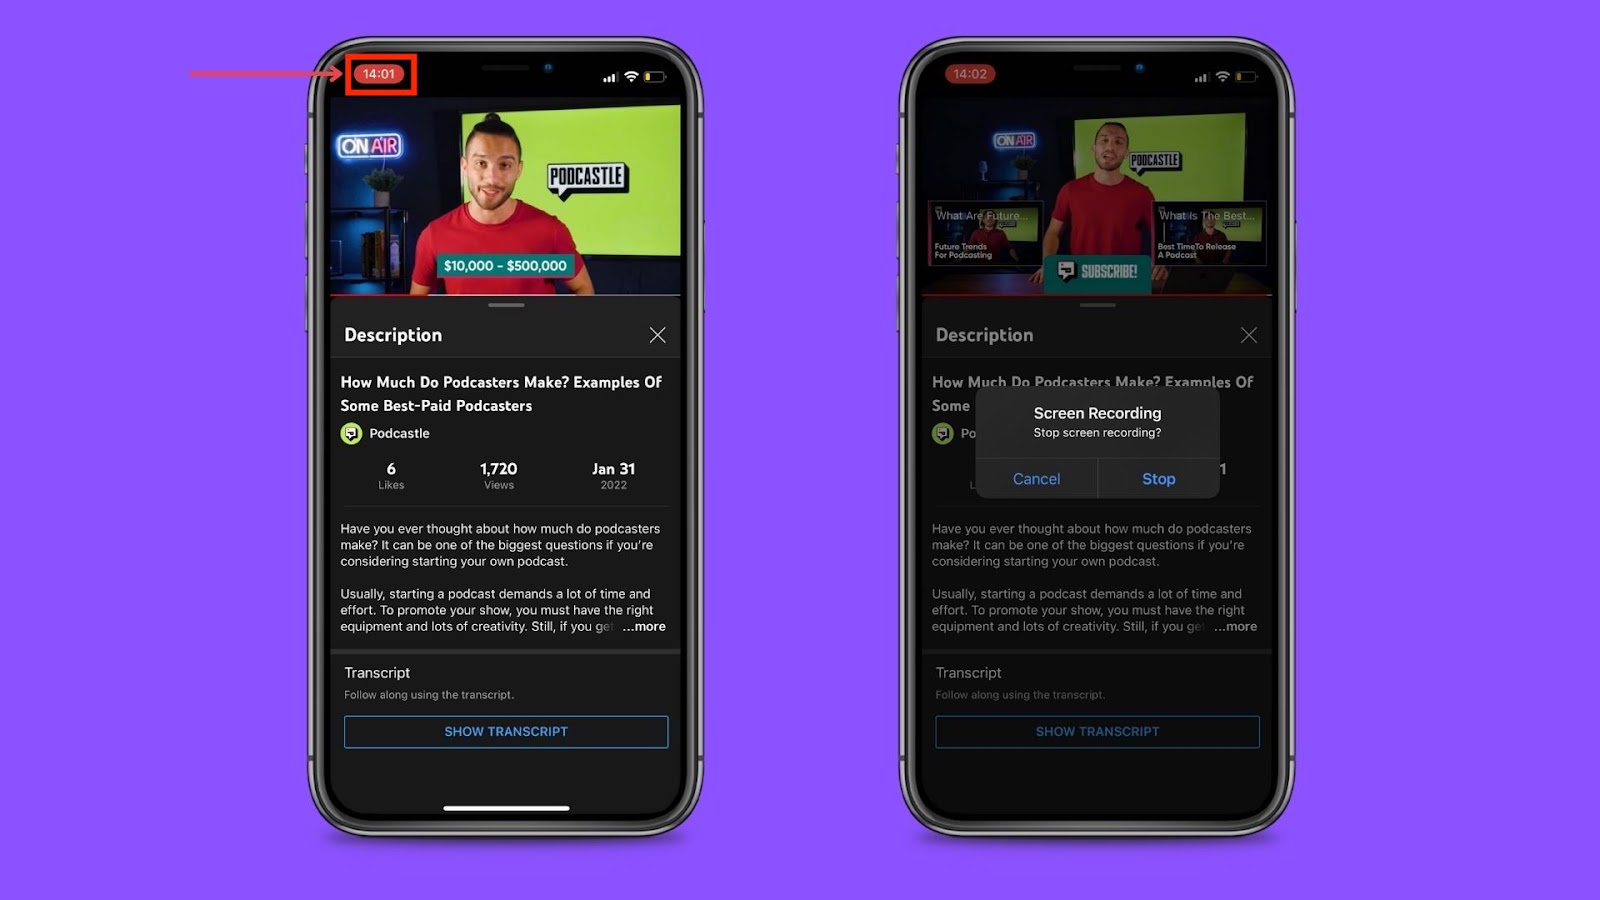
3. Your clock ought to now have a crimson background, indicating that the display screen recording session is on. To finish the recording, faucet on the clock and faucet on “Cease.” Go to your Images app and discover the display screen recording within the “Latest” folder.
Observe: Whereas the examples depicted are of iPhones, the method additionally applies to iPads.
Display Document with QuickTime Participant on macOS
If you want to seize a recording of your display screen – with or with out audio – on macOS, the quickest approach is to make use of the built-in QuickTime Participant app put in on all Macs. If in case you have deleted the software program, you possibly can at all times redownload it from the App Retailer.
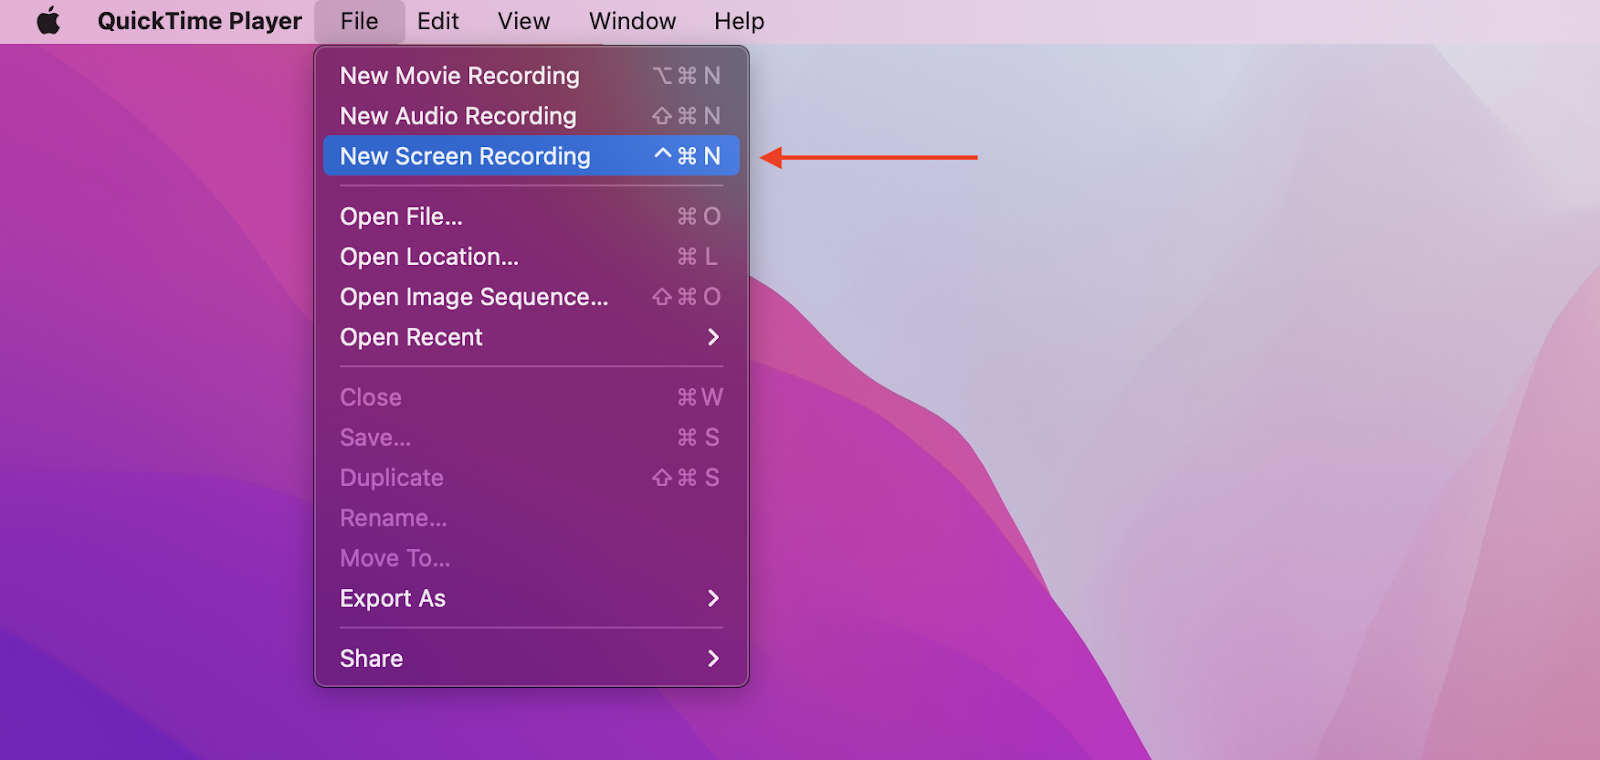
1. Open QuickTime Participant and click on on the “File” choice on the top-left of the display screen. If you cannot see the choices bar, hover your mouse on the prime a part of your display screen and it’ll seem. Proceed to click on on “New Display Recording.”
Alternatively, you possibly can launch a brand new recording with shortcuts. With QuickTime Participant open press Management (⌃) + Command (⌘) + N. With QuickTime Participant closed, or whereas on different apps, press Command (⌘) + Shift (⇧) + 5.

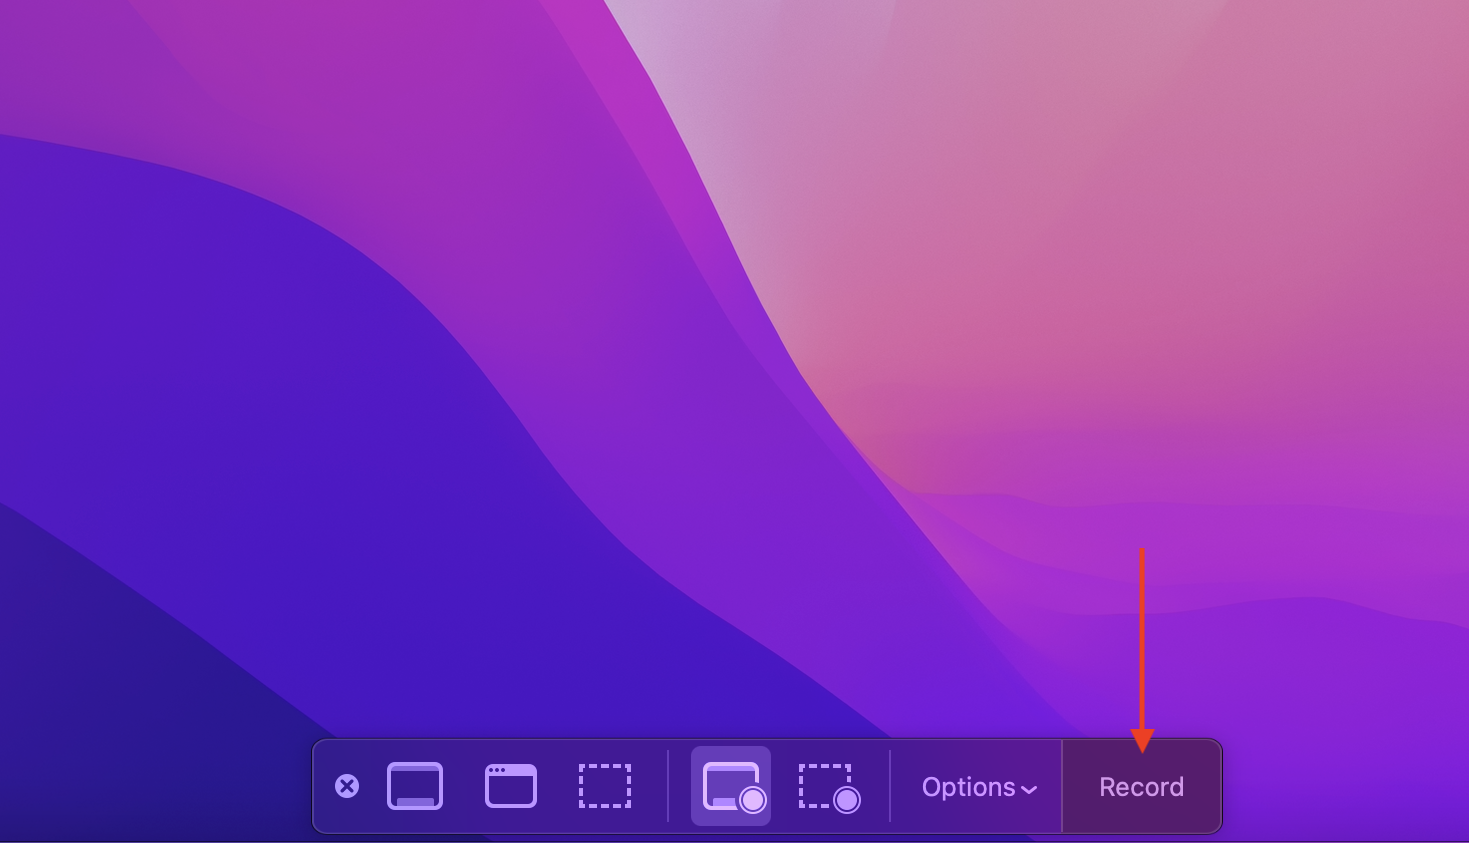
2. You must now see a management bar on the backside of your display screen. Click on on “Choices” to view the choices menu, and configure the display screen recording settings (save location, timer, microphone, and different choices). Press on the “Document” button to start out the display screen recording session.
The management bar may also allow you to determine which elements of the display screen you embody within the body. You may both file your entire display screen or the chosen portion.

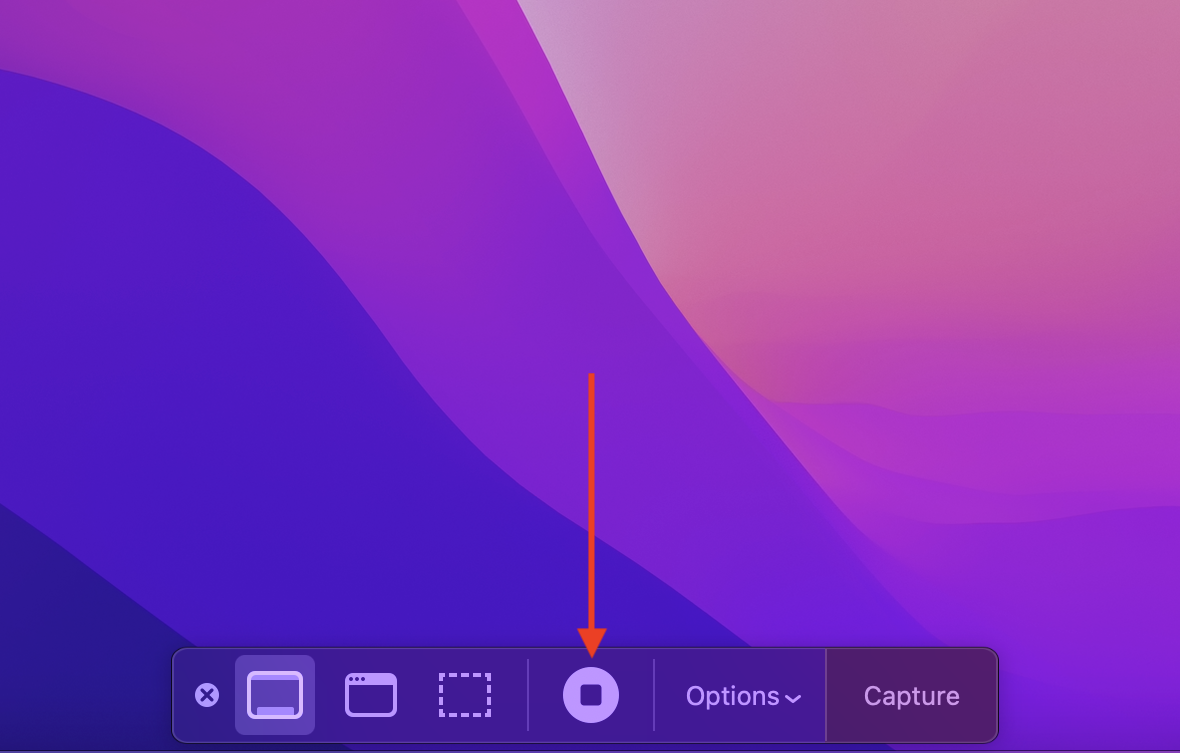
3. To complete the recording session, open the management bar by urgent Command (⌘) + Shift (⇧) + 5, and click on on the “Cease” icon.

Add Polished, Skilled Audio to Display Recordings with Podcastle
Podcastle is an AI-powered audio editor that simply provides skilled audio to your display screen recordings. With Podcastle you possibly can record your voiceover straight within the app or add an current audio file. As soon as uploaded you possibly can edit and enhance the sound high quality with none audio manufacturing information. It’s also possible to add background music and sound results to reinforce your recording.
To get began, join a free account at Podcastle.ai. Subsequent we’ll present you the way to file your audio on Mac and what instruments you should utilize to get high-quality sound.
Observe: To raised synchronize Podcastle along with your display screen recording, we advocate recording your voice in the course of the display screen recording session. Be sure you flip off the audio enter supply in your QuickTime Participant from the “Choices” menu within the management bar by choosing “none” beneath the “Microphone” part.
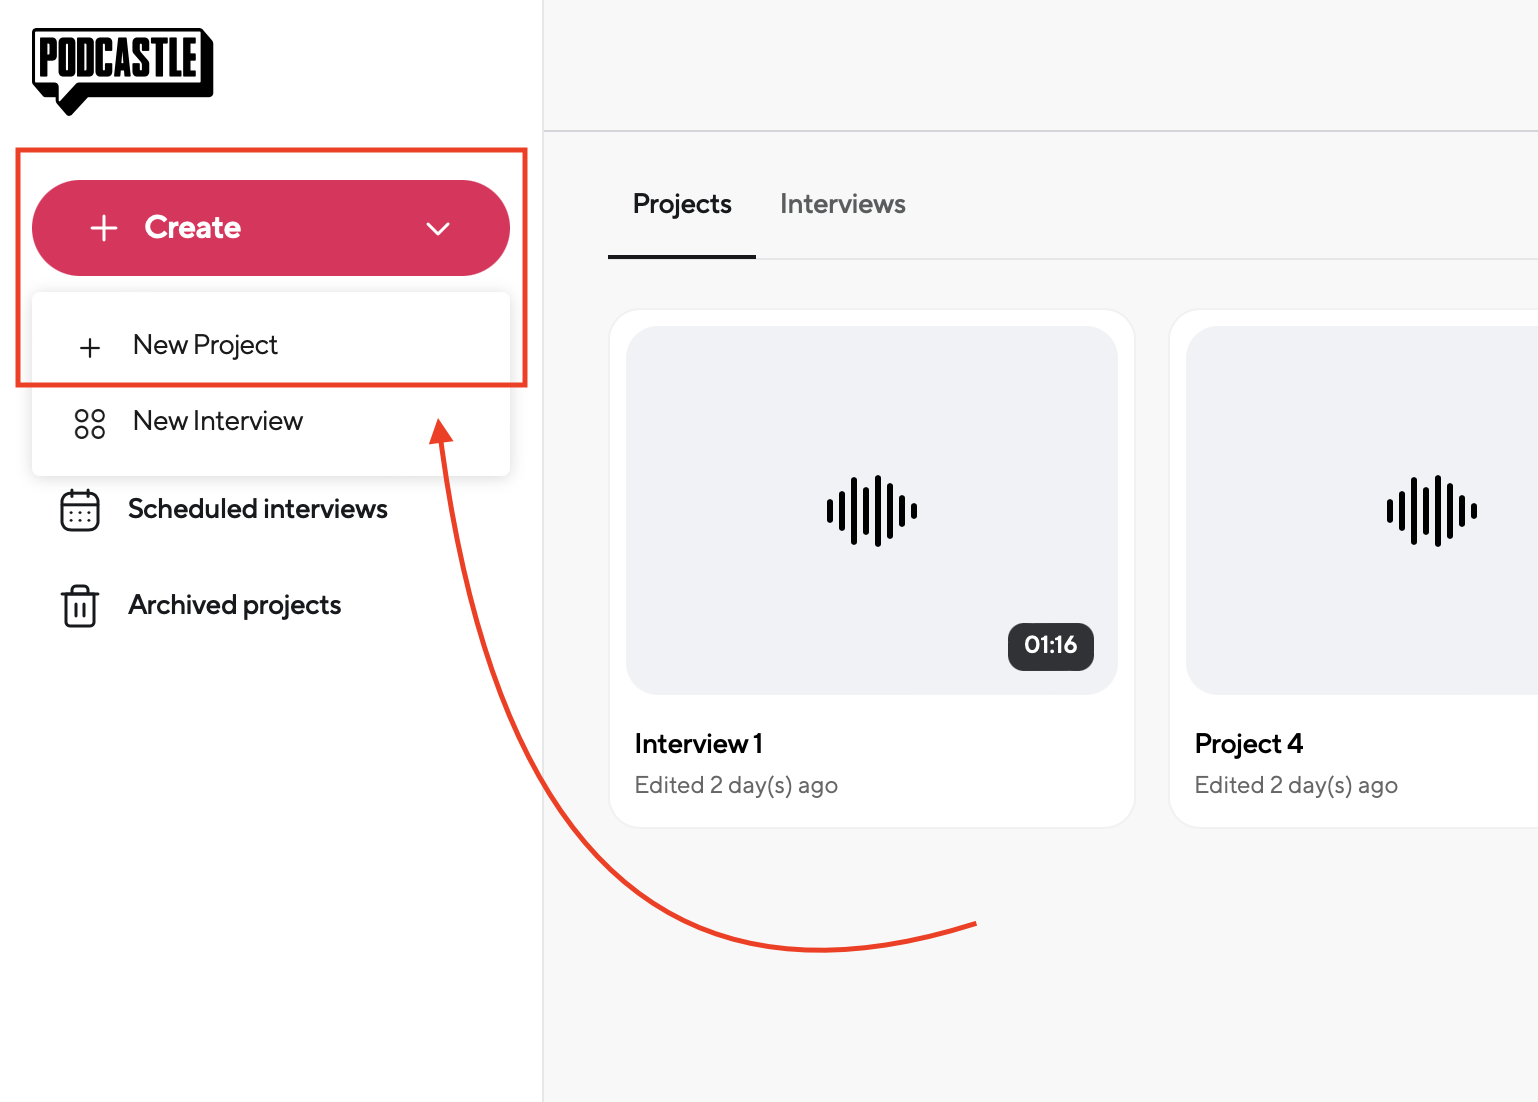
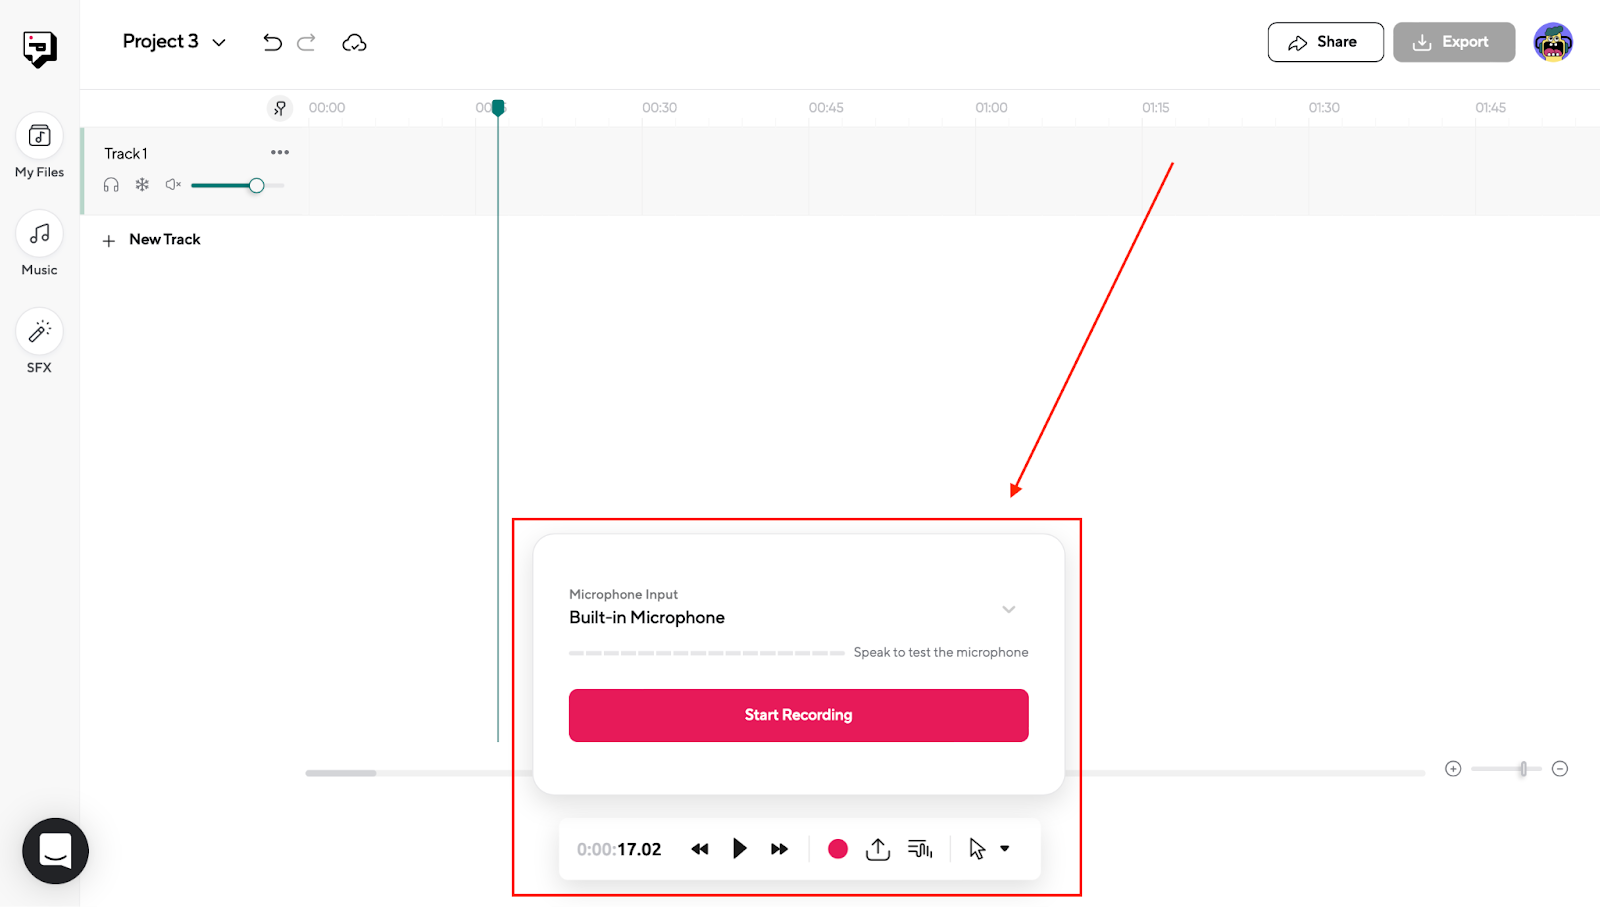
1. Open your Podcastle dashboard, click on on the “Create” button and choose “New Mission.” You’ll be redirected to the mission dashboard, the place you possibly can file your audio and add a file to make changes.

2. Click on on the “Document icon” within the participant menu on the backside to start out. Alternatively, you possibly can press “Shift+R” as a shortcut. Select your required enter supply from the dropdown menu and check your microphone to make sure it registers the sound. Begin recording while you’re prepared.

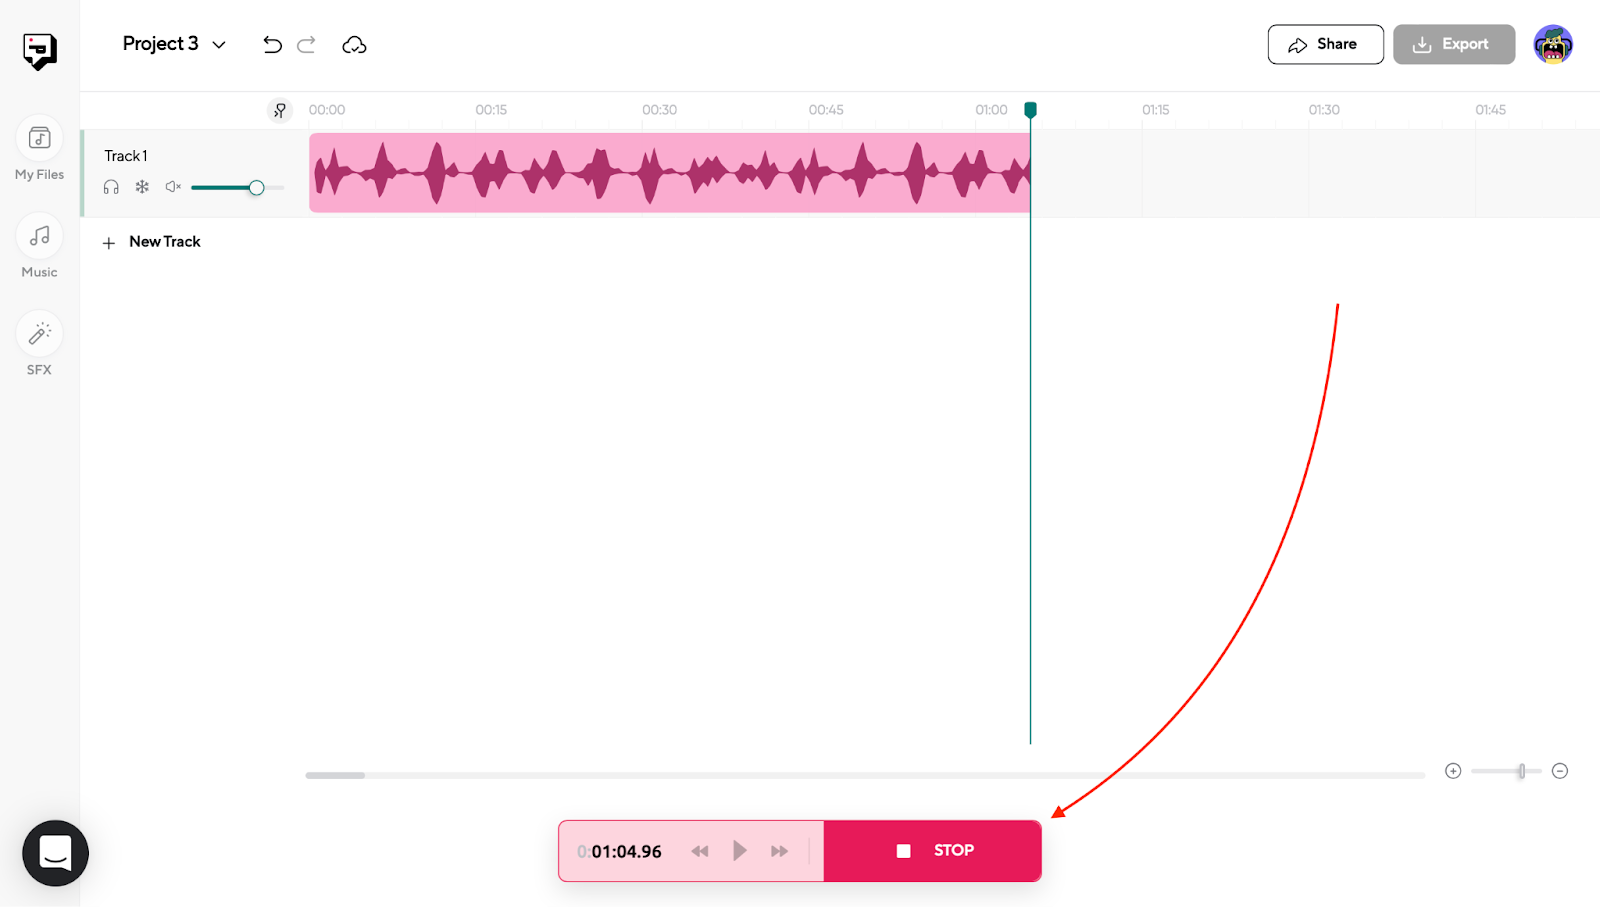
3. When you’re completed recording, press “Cease.” Now you can see your audio observe and edit it in Podcastle. It’s also possible to proceed recording or create a brand new audio observe.
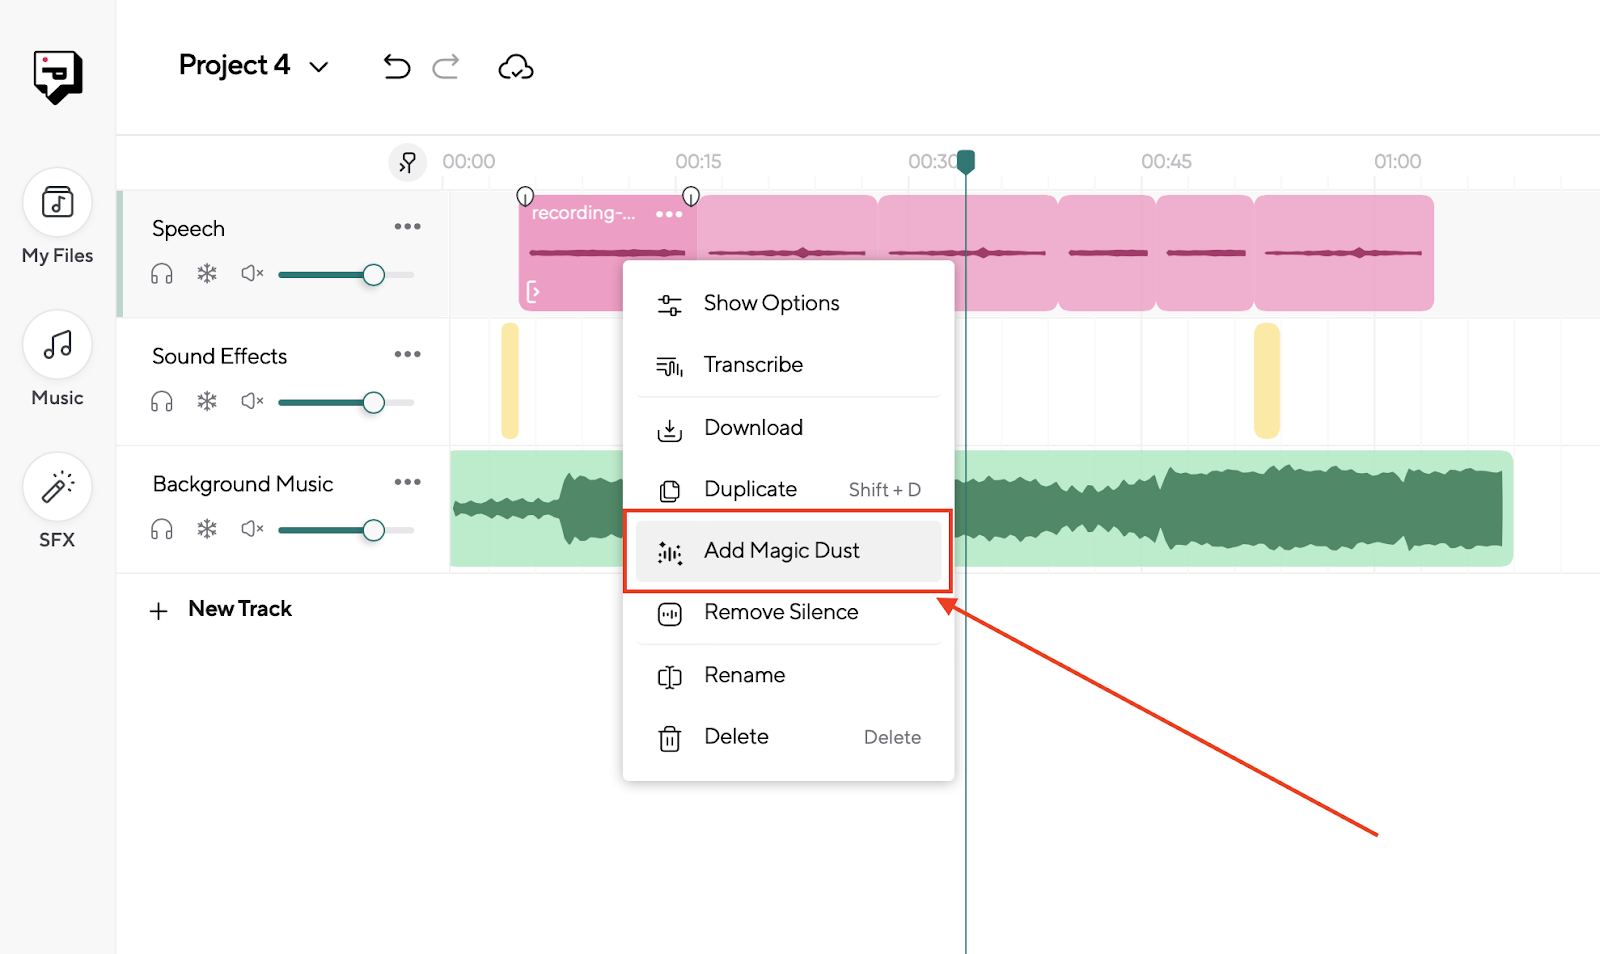
4. Use the Magic Mud characteristic to make your audio sound flawless immediately. To use this characteristic right-click in your audio recording observe and choose “add Magic Mud.” The characteristic will isolate your voice and make it stand out with wonderful high quality. It could actually take away background noise, soften loud voices, and amplify low ones.

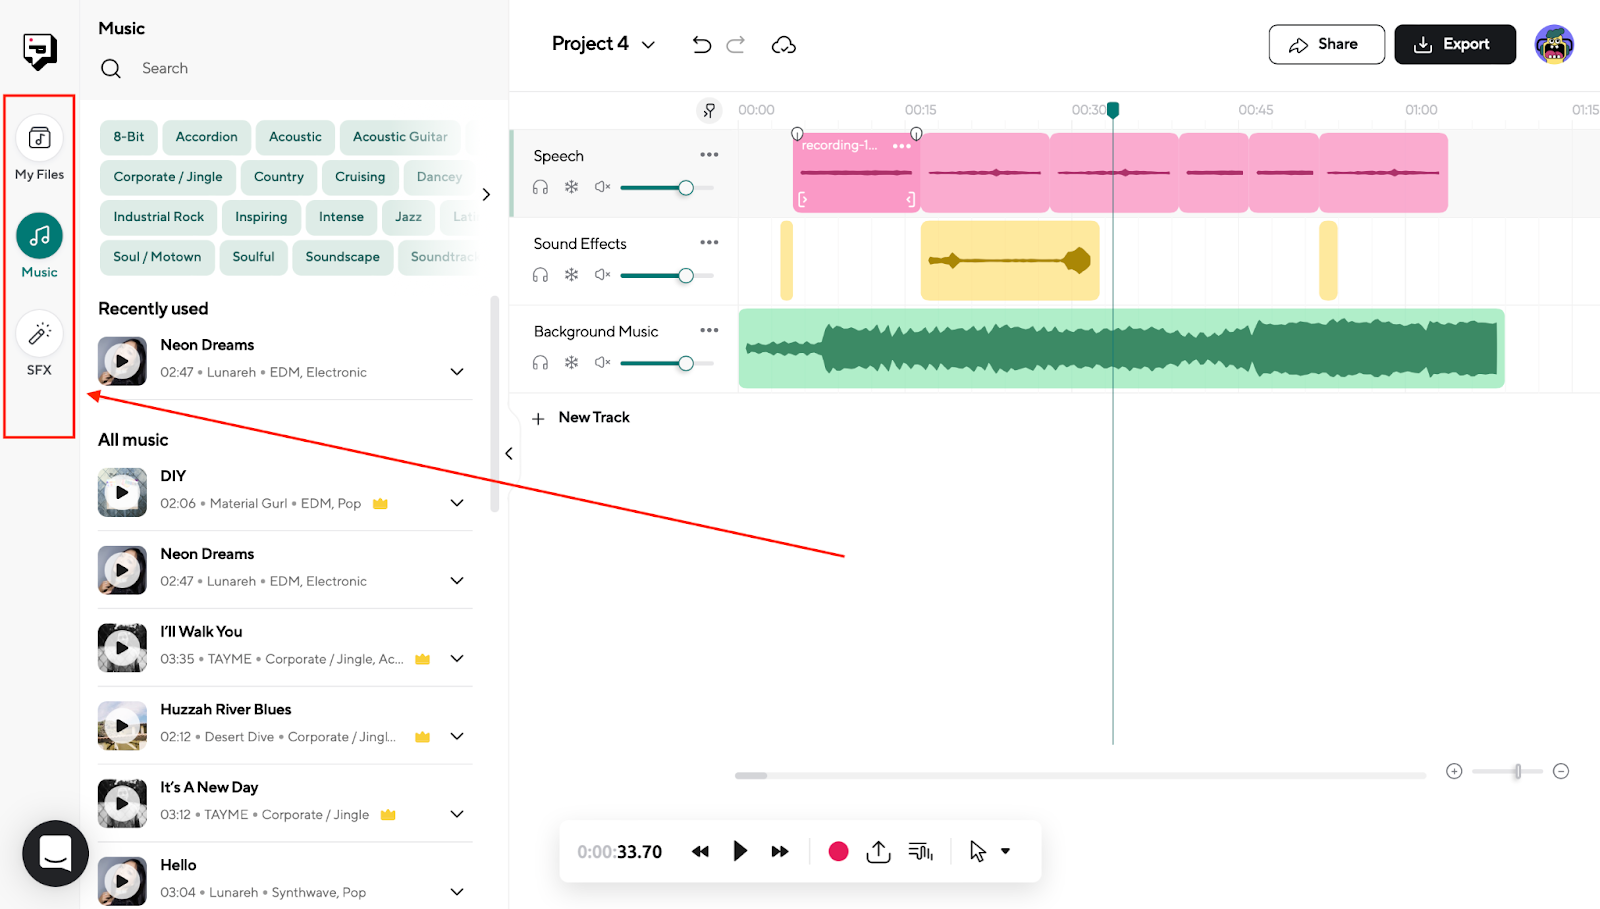
5. Add music and sound results (SFX) to your mission. Click on on the icons on the left facet of your display screen to open a catalog of copyright-free music and SFX. You may preview them by clicking on the play icon and add them to your mission. Alternatively, you possibly can add audio information out of your Mac by dragging and dropping the information into your Podcastle mission.

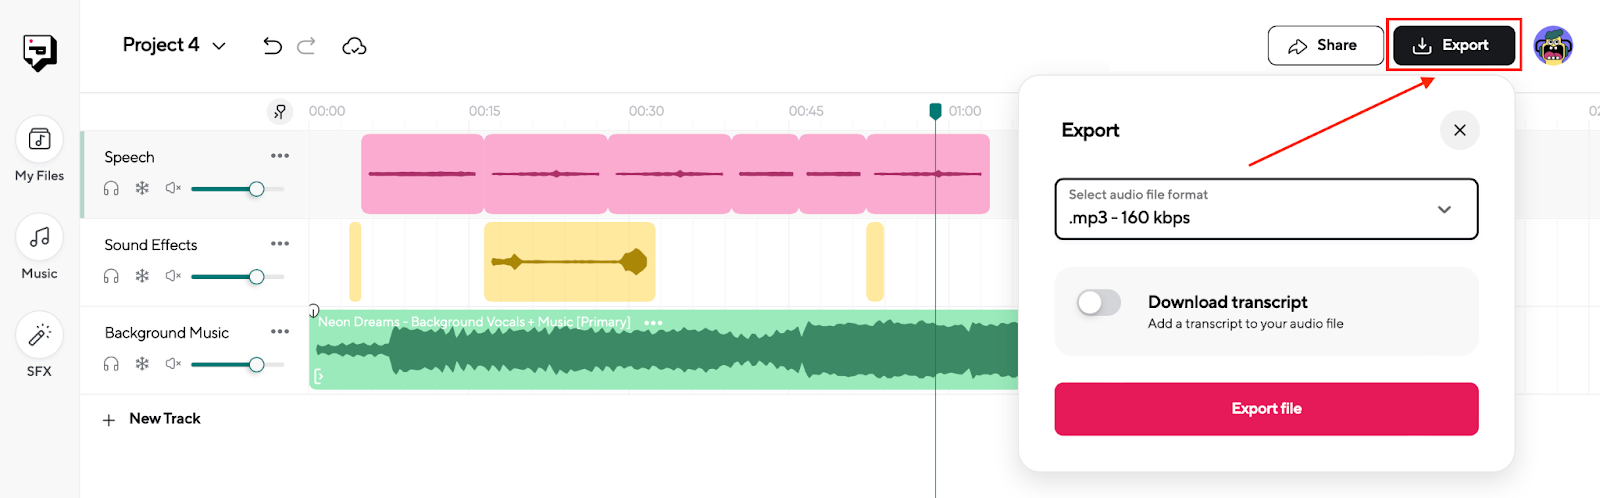
6. To export your audio file, click on on the “Export” button on the prime proper nook, choose an audio file format from the dropdown menu, toggle the “Obtain Transcript” button if you’d like the textual content model, and export your file.

Extra Professional Ideas For Podcastle
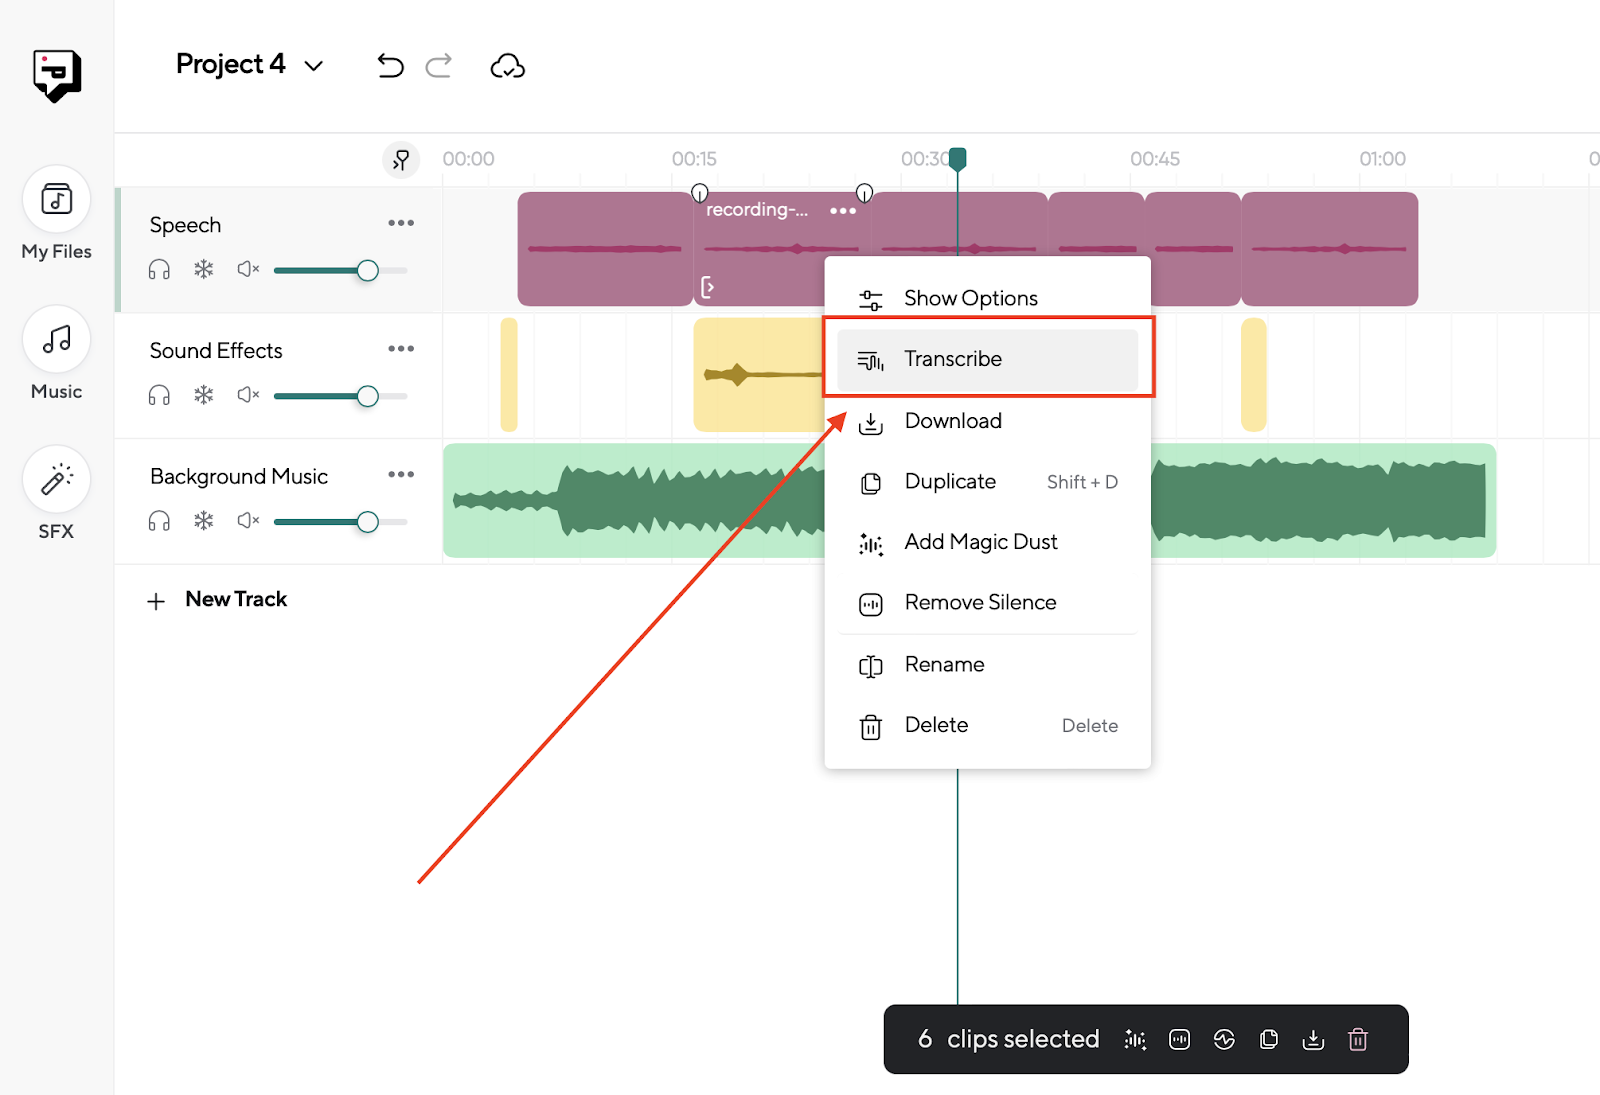
Professional Tip #1: Relying on the aim of your display screen recording, you would possibly want the transcript of your audio for varied functions. Proper-click in your audio observe and choose “Transcribe.” You’ll have your textual content in a couple of seconds.

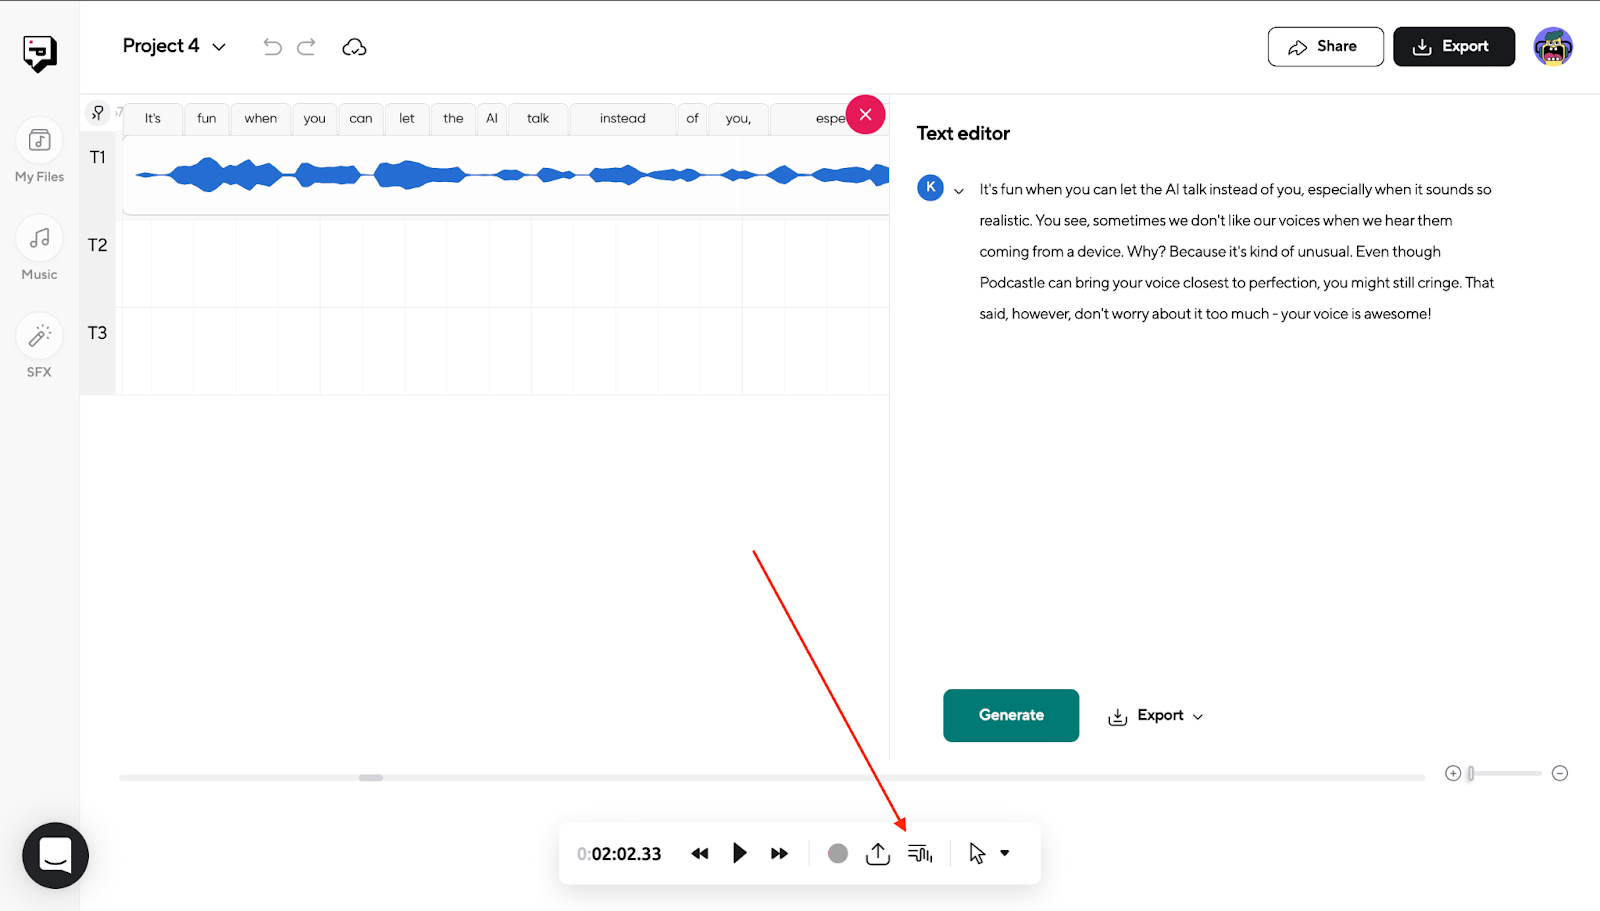
Professional Tip #2: It’s also possible to convert textual content to speech with life like AI voices. Transfer your mouse and click on the “text-to-podcast” button on the backside of your display screen. Write your textual content within the textual content editor, select the voice from the dropdown menu, and click on “Generate” to get an audio model of your textual content.

Merge Video And Audio With iMovie On Your Mac
Now you can add your voiceover in your macOS or iOS display screen recording through iMovie. It’s also possible to do that with different paid and free video enhancing software program if you want, however iMovie comes natively along with your Mac, so that you don’t should obtain extra software program.
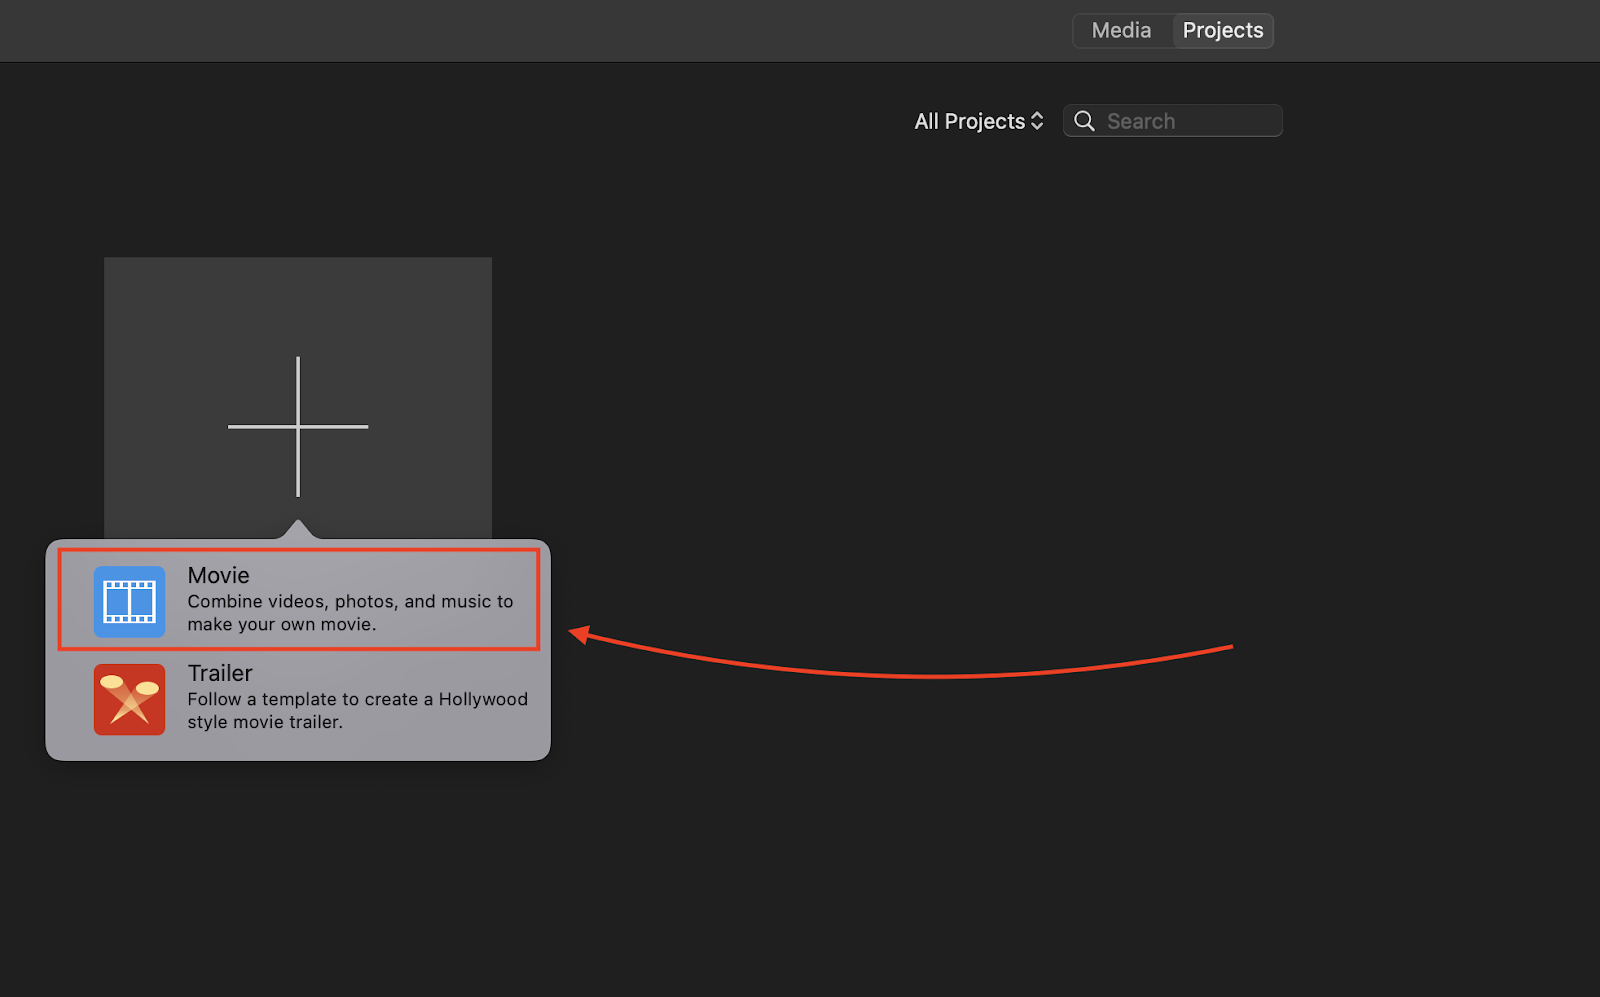
1. Airdrop the video out of your system to your Mac and open the iMovie app. Should you deleted the software program beforehand, you possibly can obtain it from the App Retailer. Click on on “Create New” and choose “Film” in iMovie.

2. Drag and drop the video and audio to iMovie on separate tracks and synchronize them. It’s also possible to make extra modifications to your video.


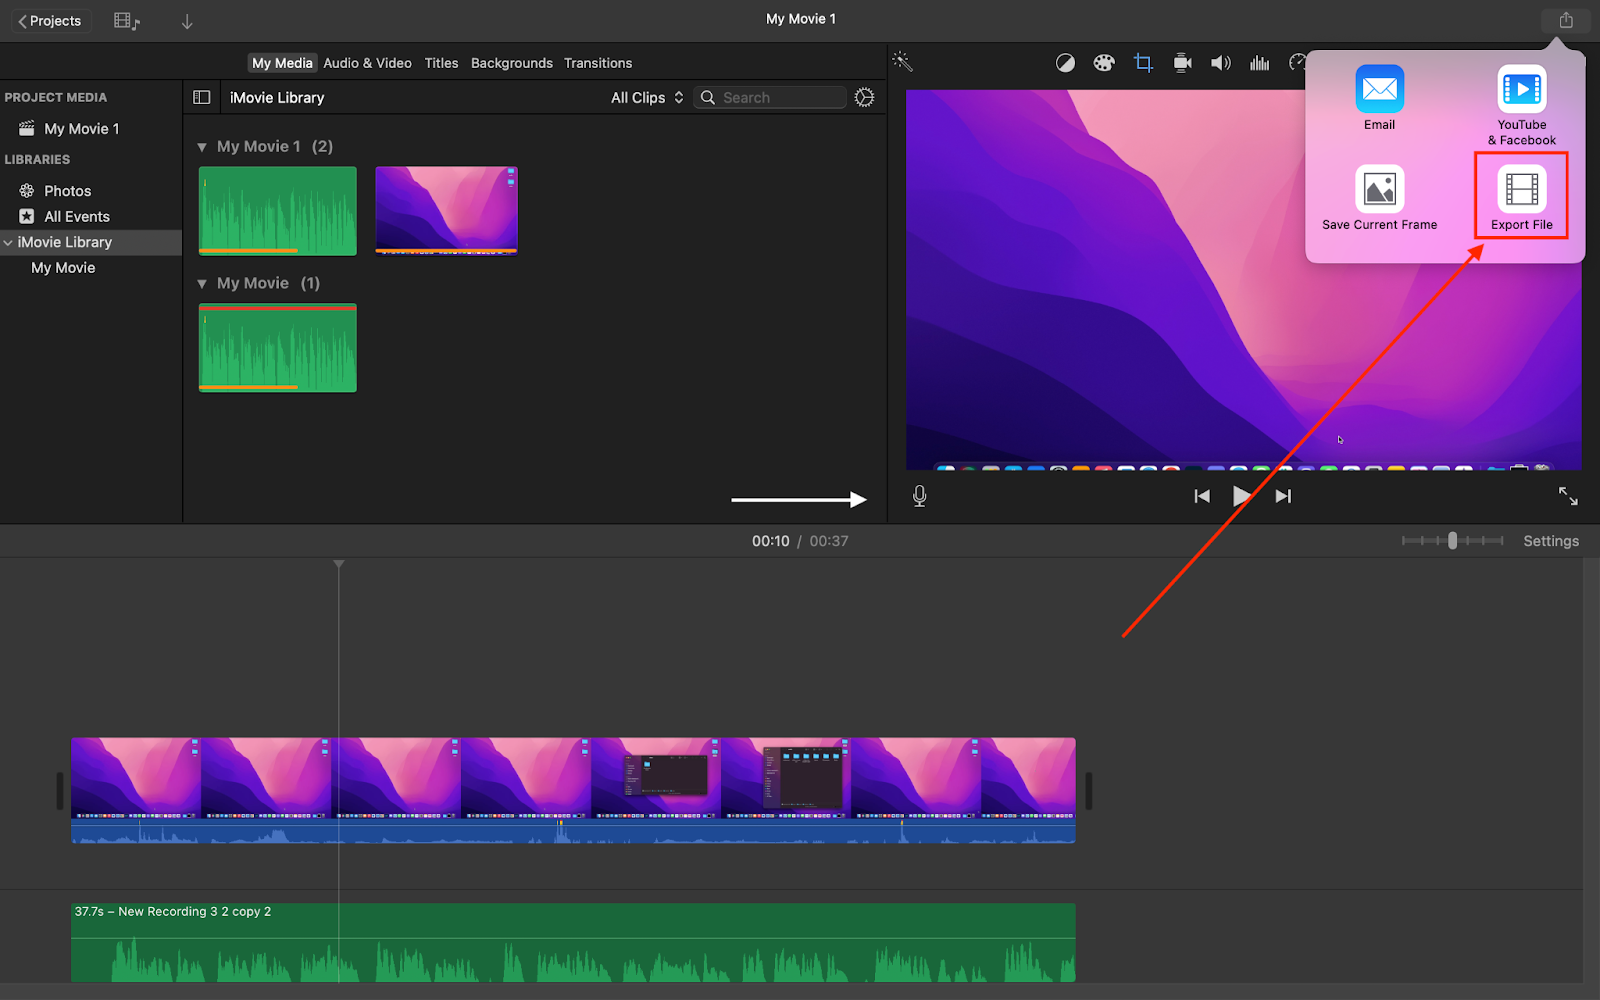
3. Click on on the icon on the top-right of the app and choose “Export File.” Configure the export settings and click on “Subsequent.”
Conclusion
Whether or not you are recording a tutorial, a software program assessment or perhaps a gaming walkthrough, or just wish to add audio commentary to your display screen recordings, Podcastle is the most effective device for the job. With its easy-to-use interface and highly effective options, you possibly can create high-quality audio tracks that may make your display screen recordings sound extra skilled and polished.


